Connecting my AppleColor RGB Monitor to a Raspberry Pi
Background:
I really enjoy tinkering with older-style CRT televisions and monitors. I appreciate the unique character that each CRT display seems to have (especially scan-lines!) I have long wanted a system to view older video content (predating LCD technology) on CRT monitors. For this reason, I began a quest several years ago to feed video signals from my modern computers into older CRTs.
While it would be simplest to just use an HDMI to composite video adapter with an old TV set, I wanted to get the best possible video quality CRT’s have to offer, and for this goal, an alternative standard, RGB video, is necessary. Not every old TV can support RGB video, and the ones that do (especially in North America with the NTSC video standard) often require some hacks to do what I want.
After years of pondering this project, it finally dawned on me to use the AppleColor RGB monitor that originally came with my Apple IIGS. Despite its proprietary connector, I realized that this monitor could be adapted to display standard 15kHZ RGB video signals. I chose this monitor for several reasons: 1) I already had it, 2) it was a convenient size (~11”) , and 3) it already displayed sharp RGB video.
SNES Proof of Concept:
Some preliminary research led me to find an article describing how to connect this exact monitor to a Super Nintendo from the 1990s. Cracking my SNES open, I soldered wires directly to its video output jack as a proof of concept. Sure enough, this worked! The monitor displayed the image exactly as I wanted it.
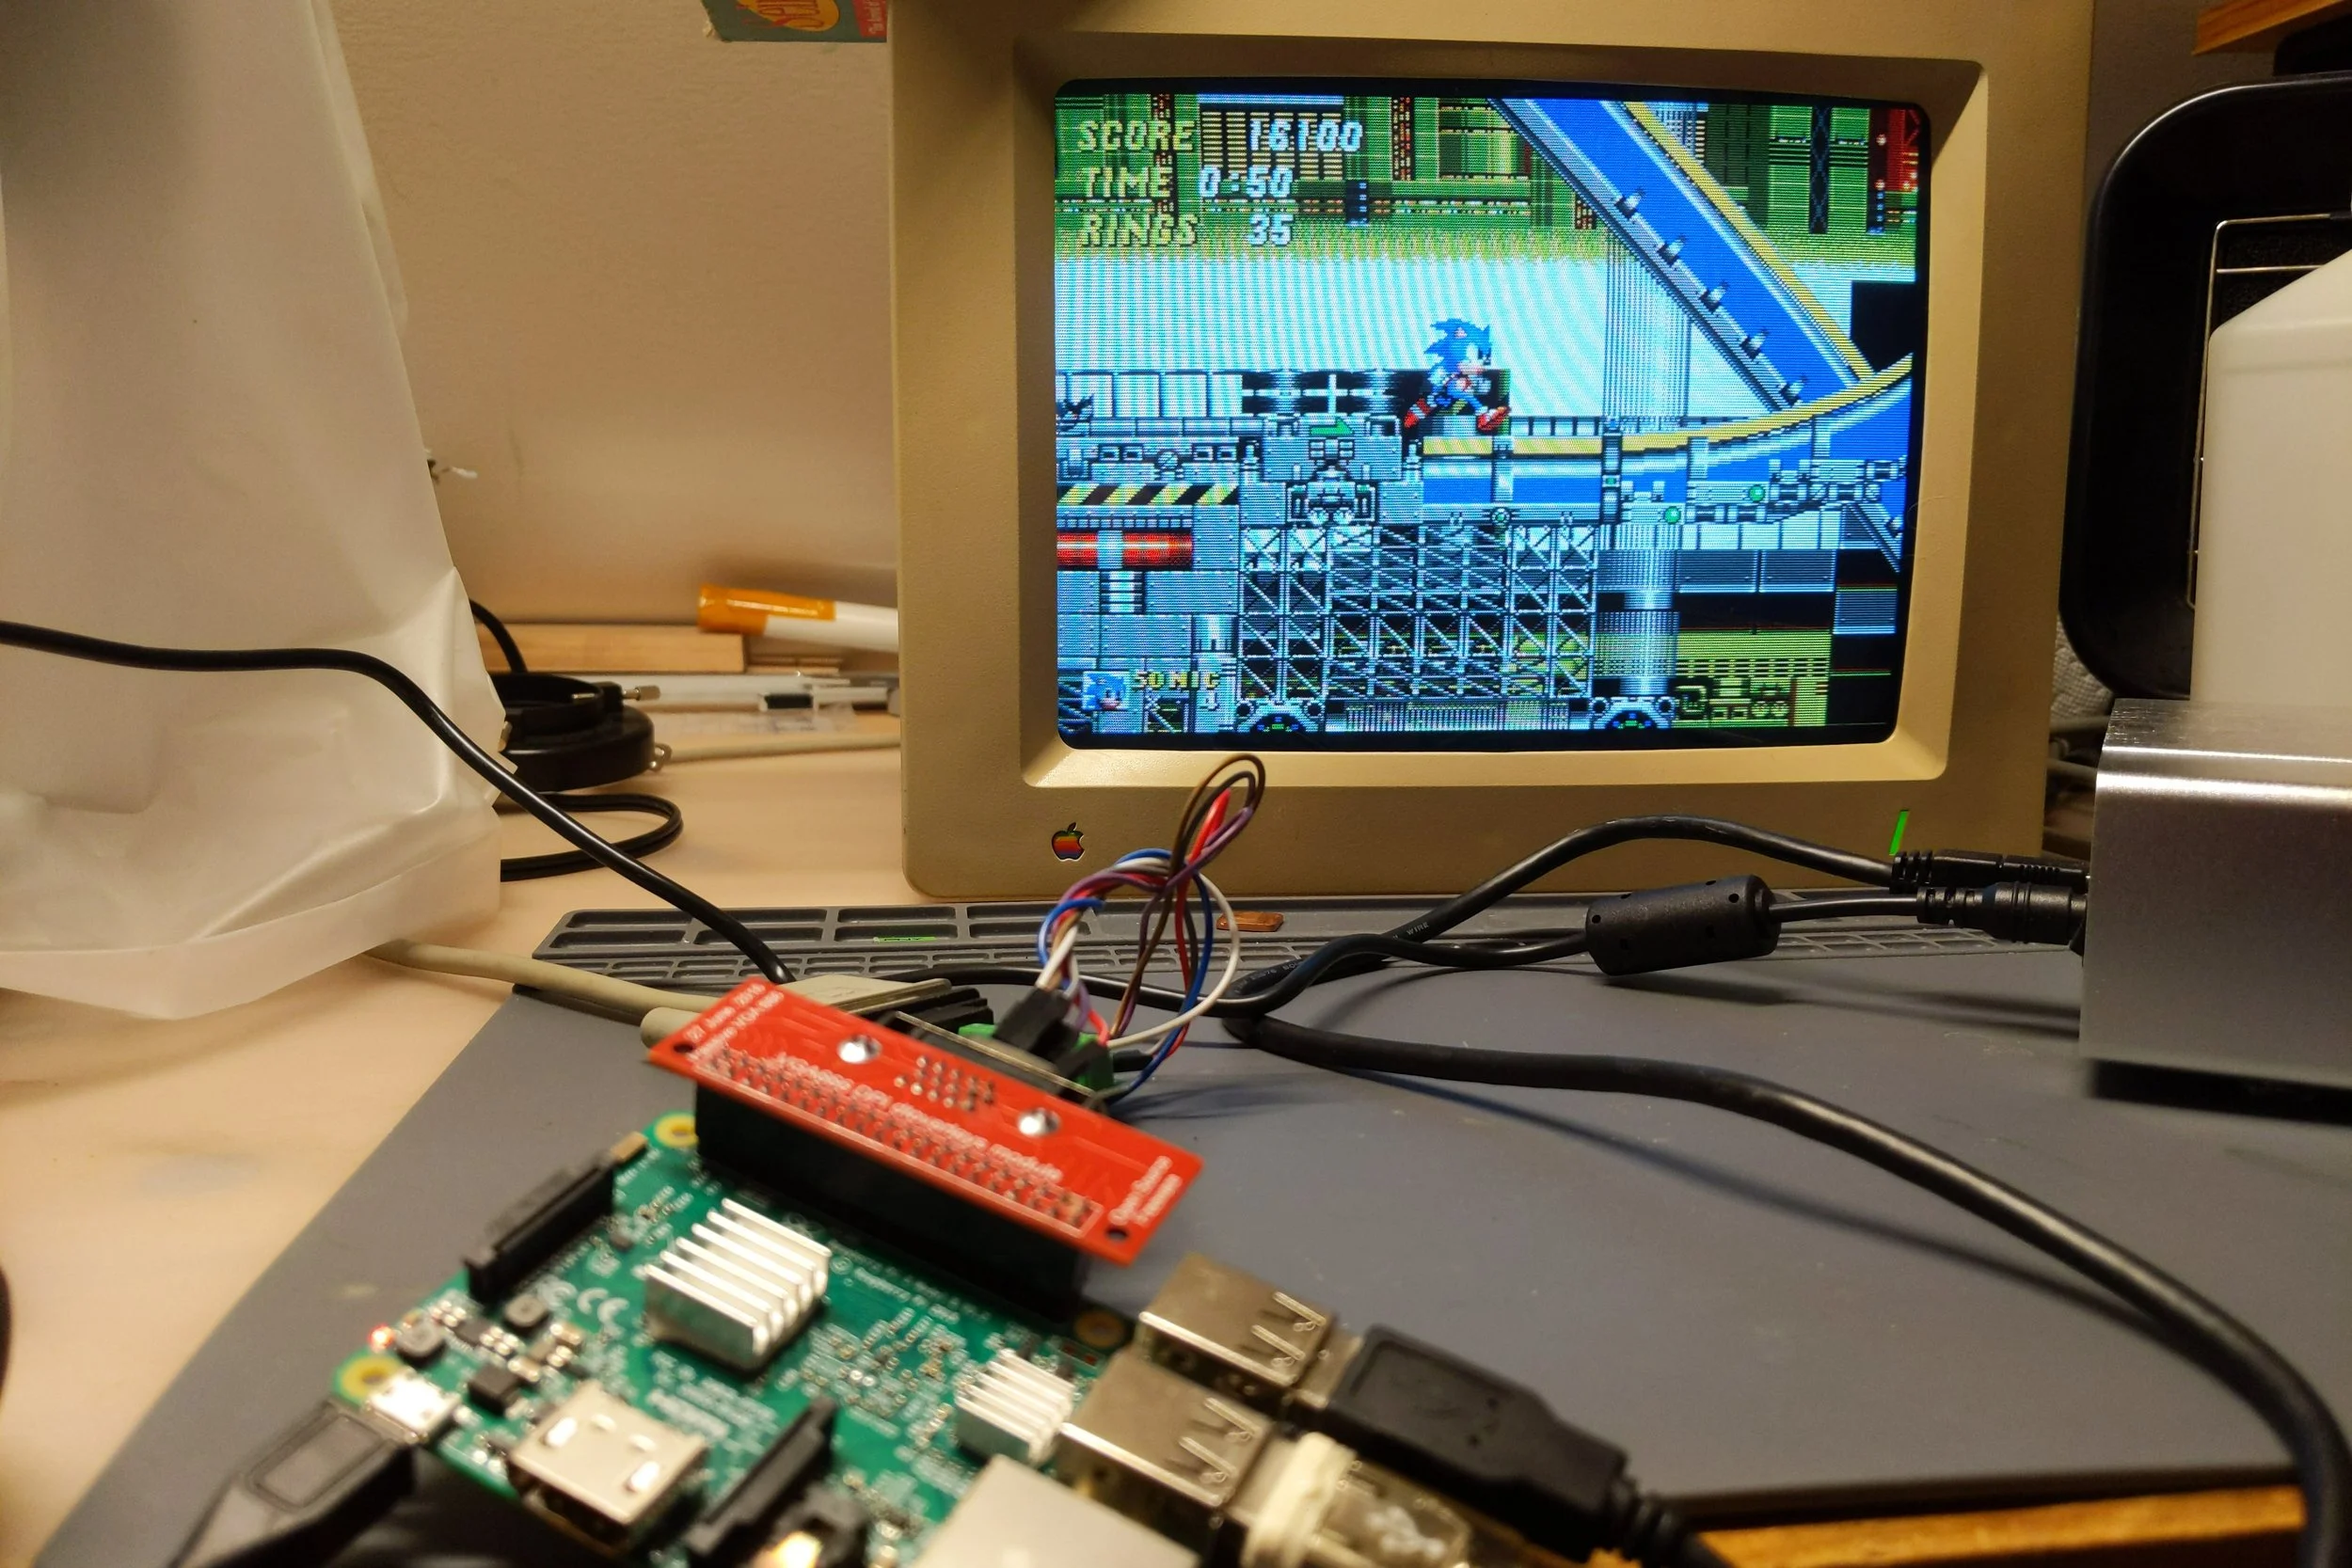
Now that the SNES was working, I decided I wanted to attach a whole computer to the monitor. This way, I could play video clips and run emulators of older computers that would look best on such a CRT monitor. The computer I had in mind was a Raspberry Pi 3B.


Recapping the AppleColor RGB Monitor:
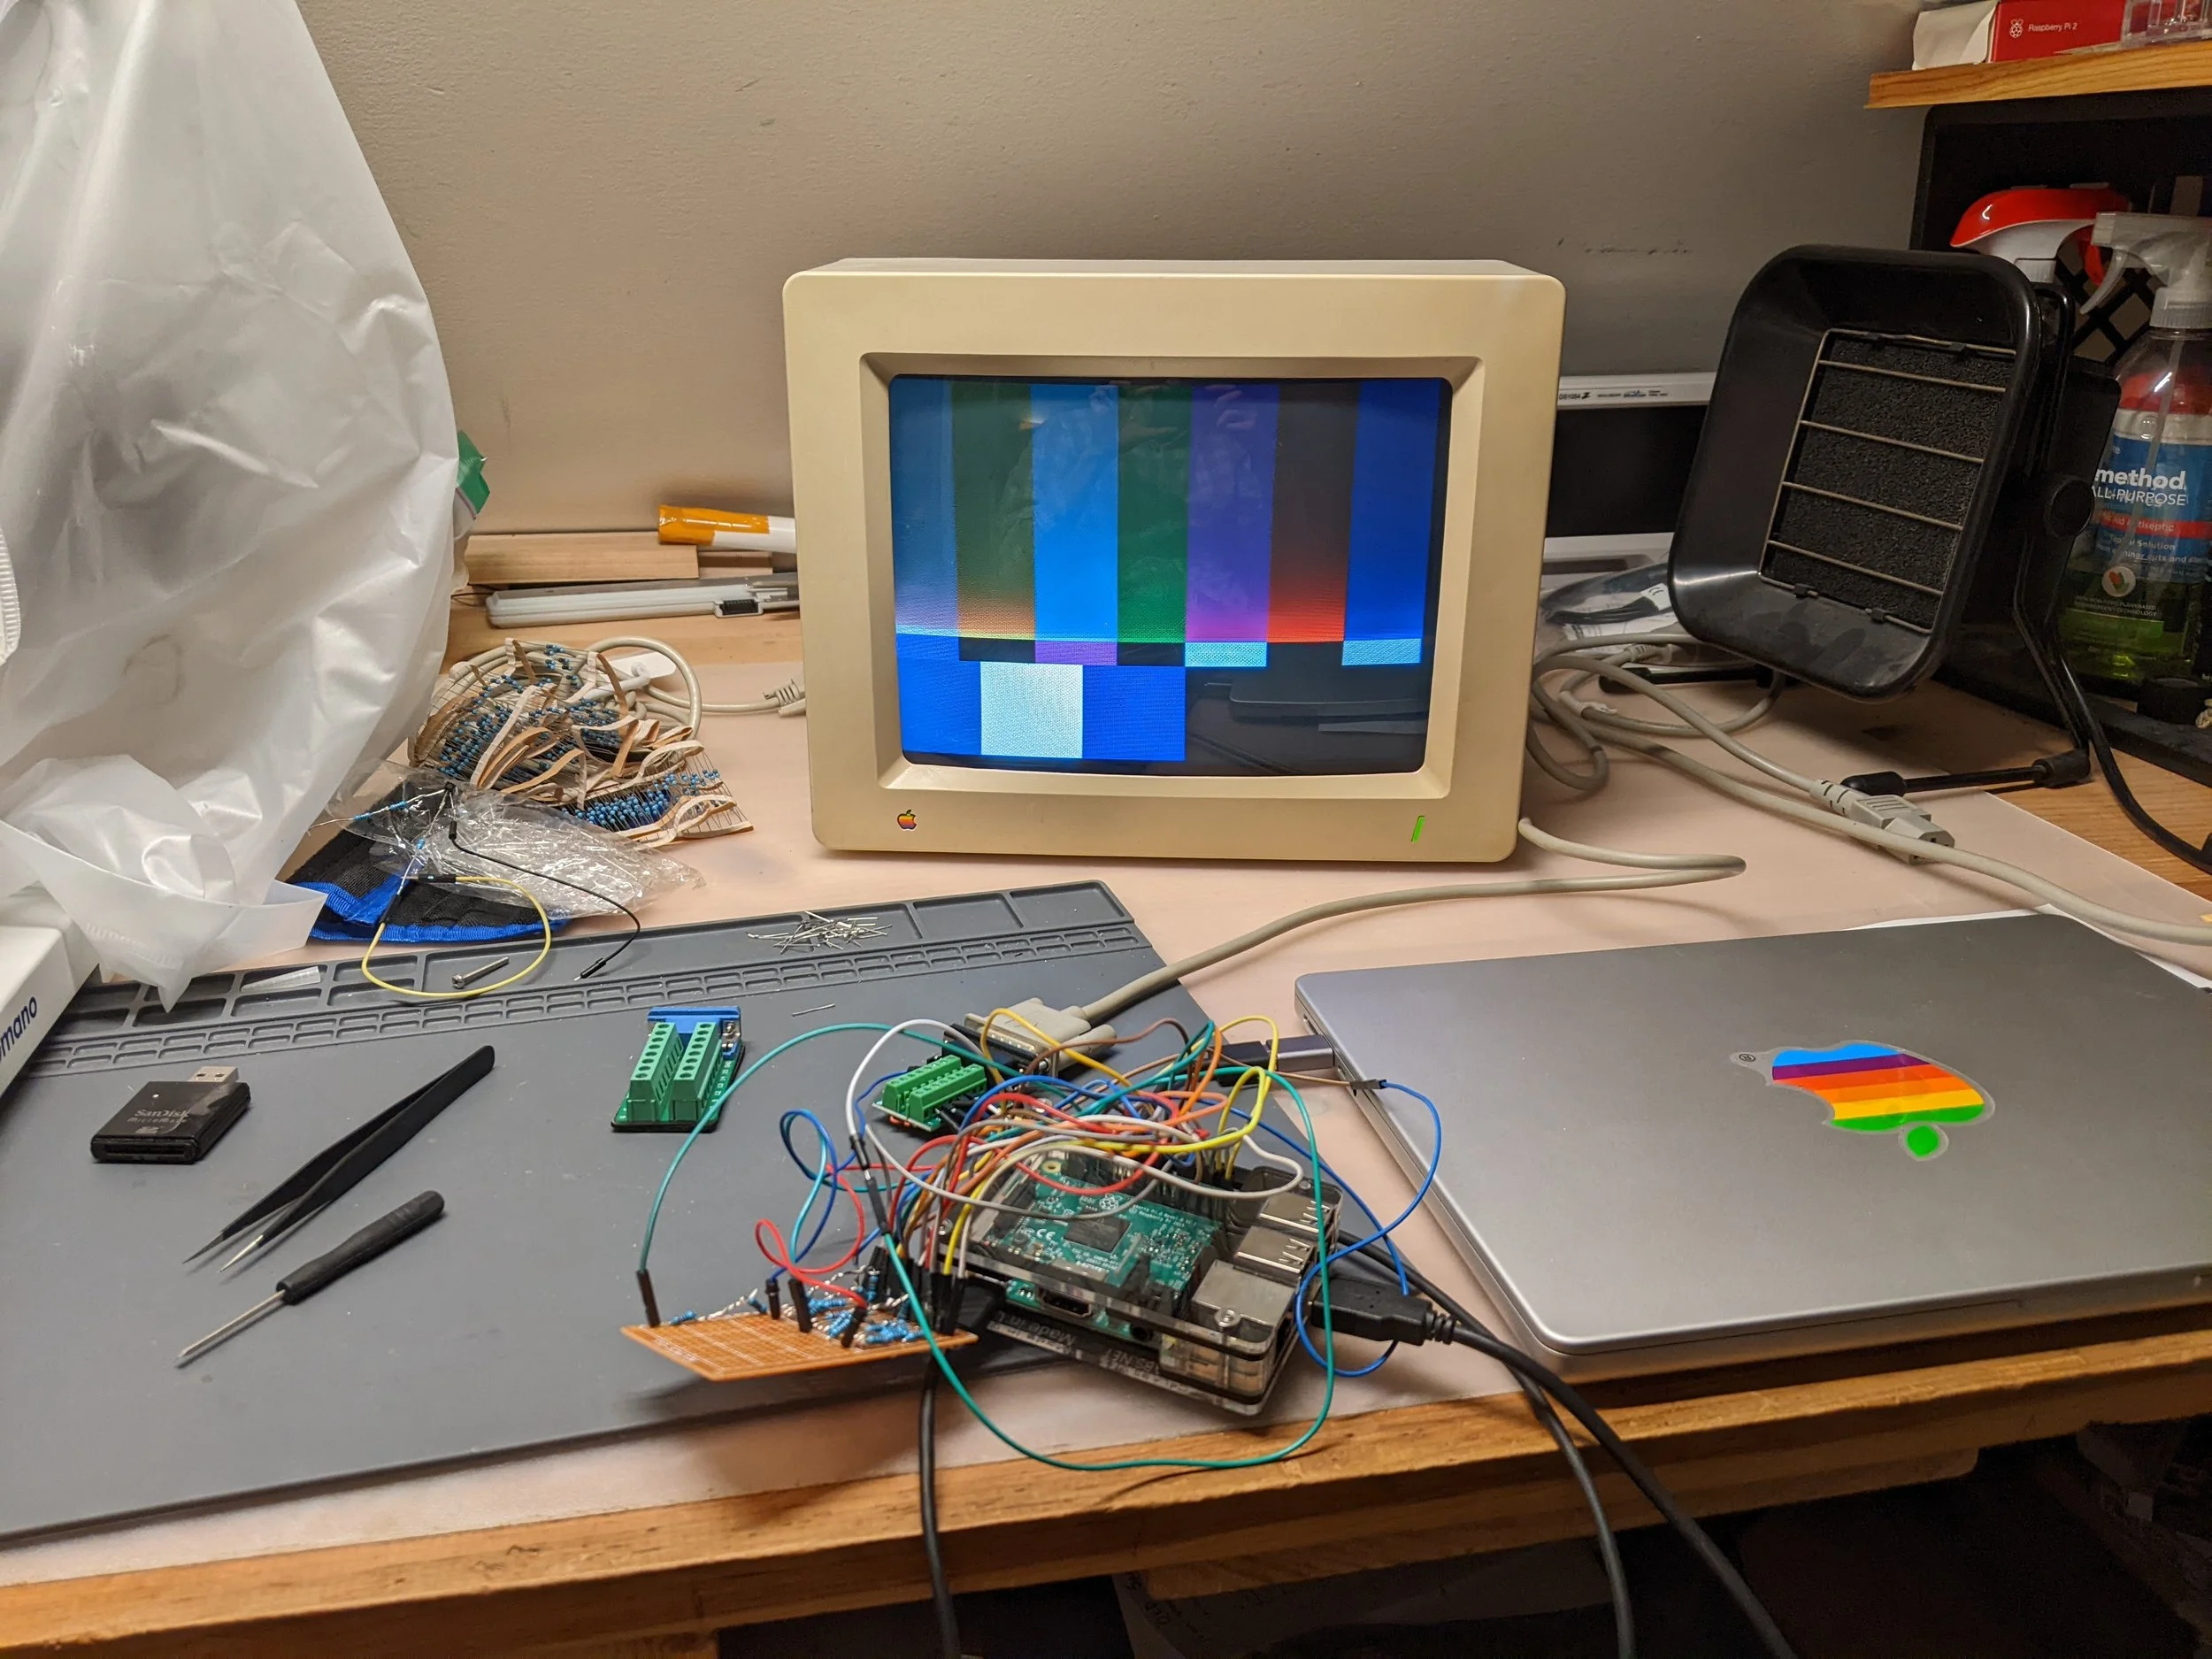
The CRT monitor I was using was 30+ years old, and the electrolytic capacitors inside of it had begun to fail. I decided to replace all the capacitors with brand new ones to ensure that this monitor stays functional for a long time to come. I purchased a capacitor replacement kit from Console5.com. I completely disassembled the monitor and put it back together after desoldering the old capacitors and replacing them with modern ones. This process took me a few hours, but was well worth the effort. While I had the monitor apart, I took the time to do some calibration and fine tuning of the video signal using a test pattern generator. Please note that working on high-voltage CRT monitors can be dangerous, and you should only attempt such a project if you know what you are doing and take adequate safety precautions!!


Attaching the Raspberry Pi:
Getting the Apple IIGS monitor working with a Raspberry Pi took me a lot of trial and error before I found an inexpensive solution that I was happy with.
I spent many hours experimenting with HDMI to VGA dongles and making DIY sync combiner circuitry, but eventually I settled upon using the GertVGA666 Raspberry Pi Hat. This “hat” is a $10 circuit board that plugs into the expansion header on top of the Raspberry Pi. While it was originally designed to connect VGA monitors to the Pi, some careful tweaking of the video timing and resolutions allows the same device to output 15kHZ RGB video.

Some technical notes:
I found that it was not necessary to use a “sync-combiner circuit” with this particular monitor. Simply tying the H and V sync lines from the Pi together was enough to generate a compatible C-sync signal.
I also found that while it is theoretically possible to build a working DIY GertVGA666, it is better to just buy a commercial one, as this makes for a cheaper and better-looking result. (I cobbled my own version of the GertVGA666 together in an afternoon using some spare resistors, but this was only a temporary solution.)
I found that proper software configuration of the Raspberry Pi is key. One of the easiest solutions I found to do this is by using the “RECALBOX” software distro. There is some good documentation on this software distribution’s website explaining what config file settings need to be changed to get CRT support via the GertVGA666 working. While Recalbox is easy to use, I eventually decided I prefer other Linux distributions that allow for greater tinkering and freedom.
I particularly liked using Kodi with the Raspberry Pi, as I was able to connect a DVD drive and watch DVD video in its perfect scanline-y 4:3 aspect ratio glory. This required the use of an externally powered DVD drive, as the Pi cannot supply enough power via its USB port alone to sustain a DVD drive motor. Something else to note: at the time of my project, December 2023, there is a glitch in the version of Kodi that comes bundled with Recalbox which prevents the mounting of DVD players in the Linux filesystem. I circumvented this by making a custom software image for my own purposes, but this solution was not ideal.
Where to go from here:
I watched several DVDs using this CRT hooked up to a Raspberry Pi. I would have prefered to use modern streaming services (Amazon Prime, YouTube, etc.), but this was not feasible for my Pi 3 (due to hardware speed constraints). I believe that a Pi 4 or Pi 5 would have been able to handle this task much more easily.
I also enjoyed playing some of the game demos that came pre-installed with Recalbox. The scanlines and bright colors really popped with this monitor. The bodge that allowed me to connect a SNES to this CRT had potential too, and I may revisit that side of the project and build a higher quality cable for this purpose at some point.