Making a functional 70’s Computer Terminal Replica
Update 3/1/2026: This article has been featured on Hackaday.com!
Introduction:
A few years ago, I attended the VCF East vintage computer festival. While I was there, I had the chance to interact with dozens of rare and interesting computers including several mainframes, minicomputers, a NeXT Cube, an Apple Lisa, and an Apple I replica.


One of the most interesting machines I used was not a computer, but instead a “dumb terminal” designed to interact with a mainframe computer: a Lear Siegler ADM-3A.
After using this ADM-3A, I wished to have one of my own, but this was not very practical due to its rarity, large size, and expensive cost. Instead, I set out to build my own working scale model of the terminal.
On thingiverse.com, I discovered plans for a project called the “Callisto II”, which while not identical to the ADM-3A, seems to draw inspiration from its design. The Callisto II is primarily comprised of seven large 3D-printed segments, a Raspberry Pi, a mechanical keyboard, and an 8” IPS LCD panel.
Using my college makerspace’s 3D printer, an Ender 3 S1 Pro, I printed out the various files from the project’s Thingiverse page. Getting everything to look nice took a lot of failed attempts and patience, but I eventually succeeded in printing out all of the pieces. Most of the 3D prints took between 12 and 24 hours to complete, so the 3D printing phase of the project ended up taking me a few weeks of time.
Finishing the 3D Print:
While I could have left the 3D-printed parts unfinished, I decided that since much of my goal for this project was to build a cool-looking computer, rather than just a useful one, it made sense to get everything looking as nice as possible. Here are the steps I took to clean everything up:
I sanded all of the 3D-printed parts down to remove imperfections and get them to be very smooth.
I used epoxy resin to glue each of the 3D printed segments together (in addition to the plastic clips the design uses). My goal was to immobilize the parts so that I could paint them. The plastic clips allowed for some very slight movement, so the paint job would have badly cracked with the clips alone.
I filled many holes and layer lines using a combination of Bondo spot putty, automotive filler primer, and wood filler. (I would advise caution in using wood filler, as I learned the hard way that some kinds of wood filler are non-hardening, and not suitable for sanding.) I think that a hardening wood filler would be optimal to fill in cracks, as it is much less toxic smelling/feeling than Bondo putty. (Bondo also seemed to somehow dissolve my latex gloves, which was concerning.)
To paint the terminal, I used several coats of Krylon Satin Rolling Surf spray paint. (I settled on this specific color as it reminded me of similar shades of blue that were used on actual ADM-3A terminals, as well as Data General Nova Computers, and the Altair 8080. (Using glossy spray paint would have made hiding imperfections in the 3D print almost impossible. Matte paint would have been better than Satin, but this paint was all I could find for sale locally.)
I stuck some rubber feet on the bottom to keep the paint from getting scratched.


Hardware deviations from the official Thingiverse plans:

While the Thingiverse plans called for the use of an 8” LCD made by Pimoroni, this part was very expensive at $100, and it was also out of stock, so I was not eager to use it. Fortunately, I realized that the same exact 8” IPS LCD panel was sold on eBay and Aliexpress by generic vendors for far less money. The part I used was called the HL080IA-01E, and cost only $36 shipped directly from China.*
I also opted to use a Raspberry Pi 3, rather than a Pi 4, as brand-new Raspberry Pis are impossible to get hold of, and I already had an extra Raspberry Pi 3 lying around. This decision necessitated making some time-consuming software changes but eventually worked out fine.
I chose to use the plan’s alternate mechanical keyboard option, the GIM KB-64, as I didn’t anticipate needing Bluetooth in my project, and this keyboard looked like it was a little nicer than the other option listed. I also replaced keycaps that I preferred over the choices listed on Thingiverse.
I didn’t purchase the USB hub or phone charging station for two reasons: I didn’t foresee needing more USB ports than the Raspberry Pi already had, and I also wanted to save money by using an existing power brick rather than trying to buy one that was both pricey and out of stock. I just let the two wires hang out the back of the computer for now, and this doesn’t bother me too much. I think that panel mount connectors on the back of the case (especially a dedicated serial port) would be cool features to add, but I have yet to do anything with this idea.
To secure the various circuit boards inside the 3D-printed case, I opted to use Velcro “3M Command strips” meant for picture hanging.
As physical space inside the case is very limited (especially for bulky cables), I bought a special 20cm “flat-flex” HDMI cable to keep things neat.
*A key detail to note is that the LCD panel does not have an even bezel all the way around. Thankfully, the project’s 3D models account for this but know that there is a way to install the screen upside down, which looks bad and cuts off a part of the screen.
Software:
One of my main software goals was to be able to run the program “cool-retro-term” or CRT, which uses 3D shaders to simulate the look of a cathode ray tube with an LCD panel. Unfortunately, the official version of the software is not very well optimized for the Raspberry Pi 3, and it runs incredibly slowly. (If I could have used a Pi 4, this likely wouldn’t have been an issue.) Thankfully, I found a special version of cool-retro-term that runs very well on the Pi 3 —the downside? The code was meant to be used with Arch Linux rather than Raspbian. Once I figured out how to do things with Arch, this wasn’t an issue. (I did have to learn a lot about Arch to get this working though, so it was definitely not nearly as user-friendly as Raspbian is. I had been meaning to learn how to use Arch Linux for a while, so I enjoyed this process, but I wish I could have just done things with Raspbian.)
Rotating the screen in software:
Another key consideration is that the 3D models necessitate that the LCD panel is installed upside down. This means the entire Raspberry Pi interface will also be upside down. Naturally, the LCD this project requires doesn’t provide a hardware screen rotation setting. Solving this issue in software on the Raspberry Pi is not necessarily a simple fix, as it is highly dependent upon the exact version of Linux you are running. Theoretically, using Raspbian makes things relatively simple, but I had to figure out how to do things the hard way with Arch Linux. For anyone following these notes, these exact display rotation instructions might not work for you (especially as the version of Linux you are using changes from mine over time), but perhaps they’ll be helpful in some very specific use cases. Reading the official Raspberry Pi documentation was really helpful to me, as most random sites online had outdated information about rotating the Pi screen.
What ended up working for me was using the line “dtoverlay=vc4-fkms-v3d” in the /boot/config.txt instead of the default video driver: “dtoverlay=vc4-kms-v3d”. Making this change is what allowed me to use the legacy display rotation setting “display-hdmi-rotate=2” in /boot/config.txt. I also manually rotated the terminal in /boot/cmdline.txt by appending this line to the file: “video=HDMI-A-1:1024x768M@60,rotate=180”.
I’ve had some trouble with an inverted mouse cursor, which I think is X11’s fault. I fixed it for now by modifying xorg.conf to render the mouse in software rather than in hardware. Despite making the mouse functional, it remains a little glitchy, so it’s not perfect. I try to avoid using a mouse with this terminal replica though, as I think it feels a bit anachronistic. I intend to experiment with Wayland as a replacement for X11, and hopefully, it will resolve the mouse-related issues I’ve been having.
Fun programs to run:
I initially resisted the idea of installing any window manager on the terminal, as I wanted it to be command line only, but I found this decision limiting, so I installed i3 window manager. Having a window manager ended up making everything work better for me. As a result, I could run cool-retro-term in full (or split) screen mode without the special “—platform eglfs” command I was used to. i3 window manager also expanded the software options available to me, and even let me run modern Firefox (although it does look a little silly on such a retro-styled machine).
Apart from cool-retro-term, some of my other favorite programs to run on this terminal have been frotz, telnet, lynx, aafire, as well as SimH. SimH has been particularly interesting, as it allows me to emulate the period-appropriate mainframe computers that an ADM-3A would have been hooked up to in the first place: So far, I have only played around with the PDP-8 and PDP-11 emulators, but I hope to someday connect this entire replica to a PiDP-11 over a DB-25 RS232 serial cable to have a complete scale retro system.
I have also installed several other emulators on this Raspberry Pi, and so far have experimented with linapple and minivmac.
Using frotz to play Infocom’s interactive fiction games has been an interesting experience on this computer. Something about the way cool-retro-terminal looks on this screen really sells the illusion of the system is far older than it is to me. So far, I’ve played a bit of Zork I and The Hitchhiker’s Guide to the Galaxy.
Future ideas:
One of my goals for the future with this machine is to see if I can do anything useful with it. I think that it would make an enjoyable word processor. I enjoy the mechanical keyboard, and I think I could probably manage to get Google Docs to run on this hardware. Otherwise, I will likely use the machine to play various older games, and perhaps I can set up a screensaver to have it act as an interesting clock while it is idle. Running the games Myst or Riven through ScummVM on this machine could be interesting, although these pieces of software are so much newer than the 70’s style of equipment the terminal is intended to look like.
I’d also like to get the machine set up to be a functional serial terminal, just in case I ever want to use it with actual vintage hardware (or modern equipment emulating vintage hardware). I think that this goal could be fairly easily achieved with a USB to-serial adapter and a panel mount serial port connector. I could probably also use the Pi’s built-in GPIO UART pins and a level shifter to accomplish the same goal, but I already have a USB to-serial adapter lying around.
Update 3/1/2026:
This project has since been featured on Hackaday! In the few years that have passed since I wrote this article, I’ve made a handful of modifications to the computer terminal. Many of my design decisions were influenced by a need to save money during the Raspberry Pi shortage a few years ago. Finding the horsepower of the Pi 3 lacking (especially for the 3D graphics that the cool-retro-term program uses), I eventually replaced it with the guts of a base-spec 2014 Mac Mini.
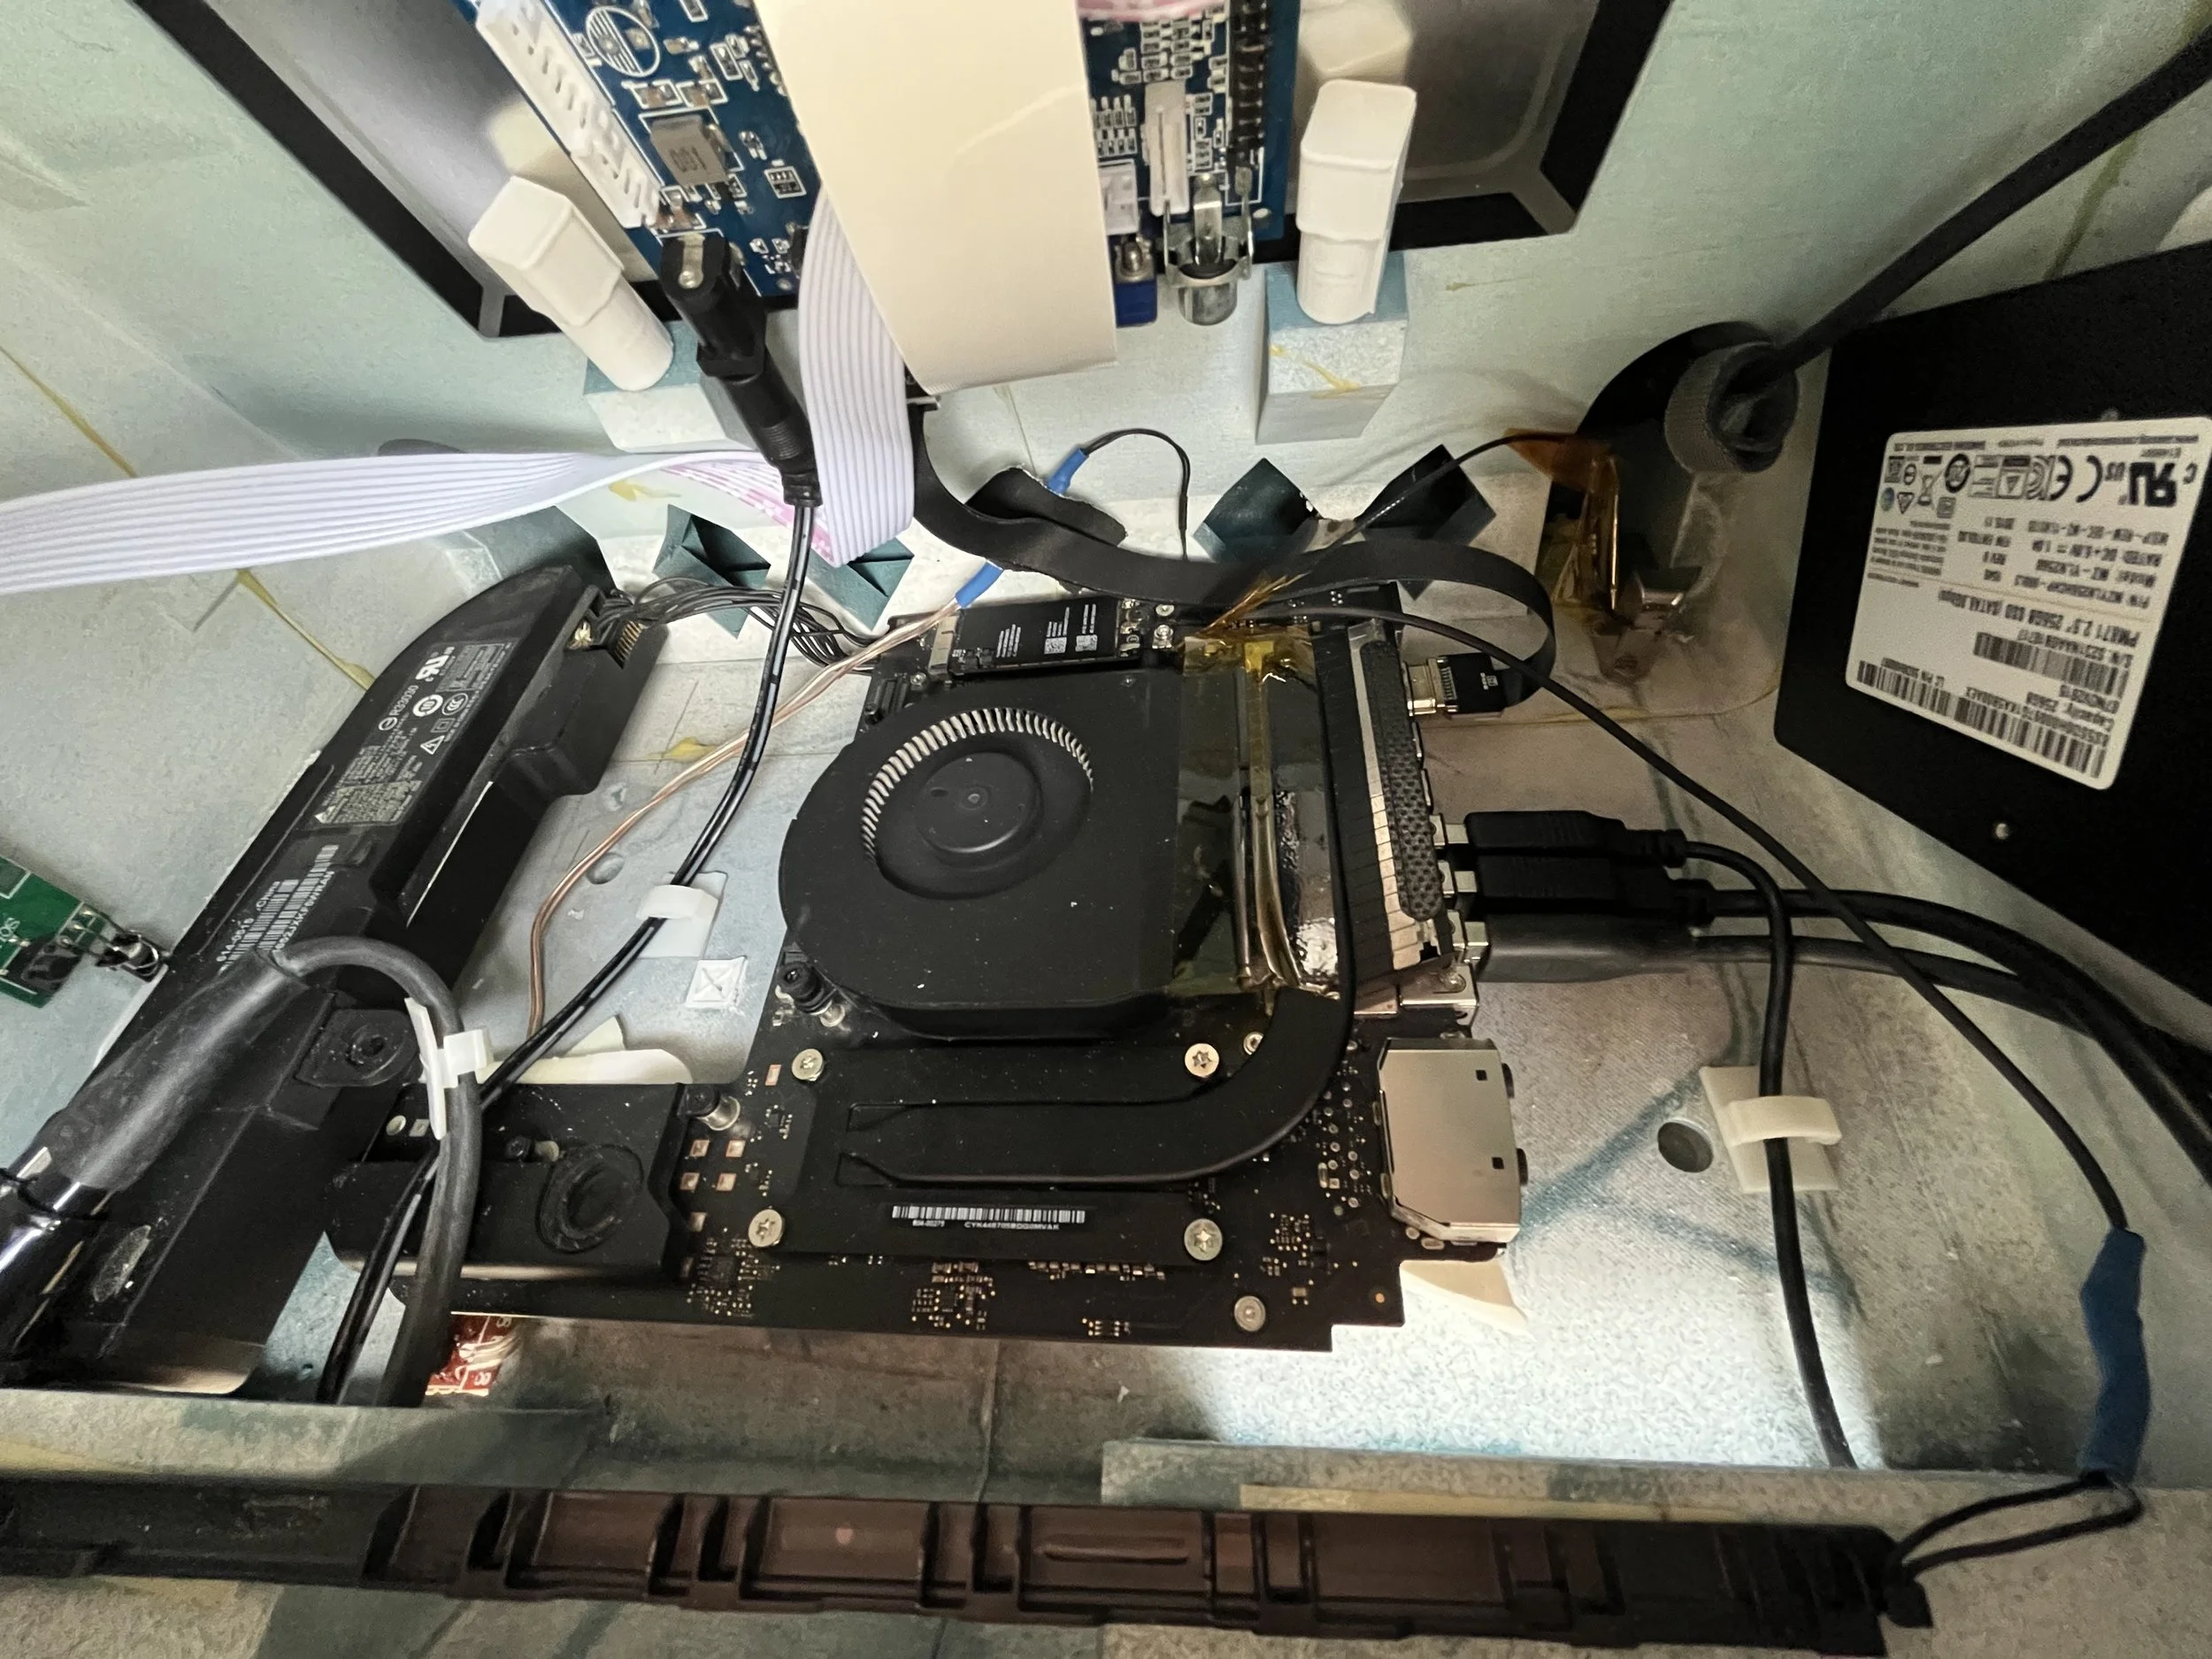
Mac Mini-fied 70’s Computer Terminal
I saved several of these older Mac Mini computers from the trash, and they have significantly more horsepower than old Raspberry Pi’s. I had to completely disassemble and “frankenstein” the guts of the Mac Mini to cram them inside the 3D printed chassis of the terminal replica, but the horsepower boost was significant and well-needed. I threw a copy of Linux on the Mac Mini, and essentially have it doing the same tasks as the Pi 3. I had to extend the Mac Mini’s original power button to the outside of the chassis using some carefully soldered jumper wires. Rather than use the Mac Mini’s bulky WiFi/Bluetooth antenna, I ended up using an antenna taken from a junked MacBook Air chassis I had lying around (it fit better in the plastic case). I also couldn’t get the Mac’s stock SSD to fit nicely inside the tight confines of the 3D printed housing, so I instead opted to stick a USB 3 to SATA SSD adapter inside the case as a kludge.
Reflecting back on this project, I am absolutely blown away by how far 3D printers have advanced since I made this a few years ago. I struggled considerably with the Ender 3/5 printers I had access to at the time, but am confident that the current generation of Bambu-style Printers could churn a project like this out with ease.