Turning my 1948 GE Radio into a time machine
Update: 2/4/2026: This project has been featured on Hackaday.com!
Old radios and TVs have fascinated me for years. As a passionate DIY restorer of vintage technology, nothing excites me more than switching on an old gadget and experiencing what it was like to use many decades ago. To me, something about seeing modern content on a vintage machine just feels off. When I revive a piece of old technology, I think it is fascinating to provide it with period-accurate inputs. To this end, I have long wanted to restore an old radio and play historic media through it. Luckily, the Internet Archive is full of thousands of radio shows (the precursor to TV shows,) news broadcast recordings, old music, and even a handful of recorded “complete broadcast days” (a kind of radio time capsule.)
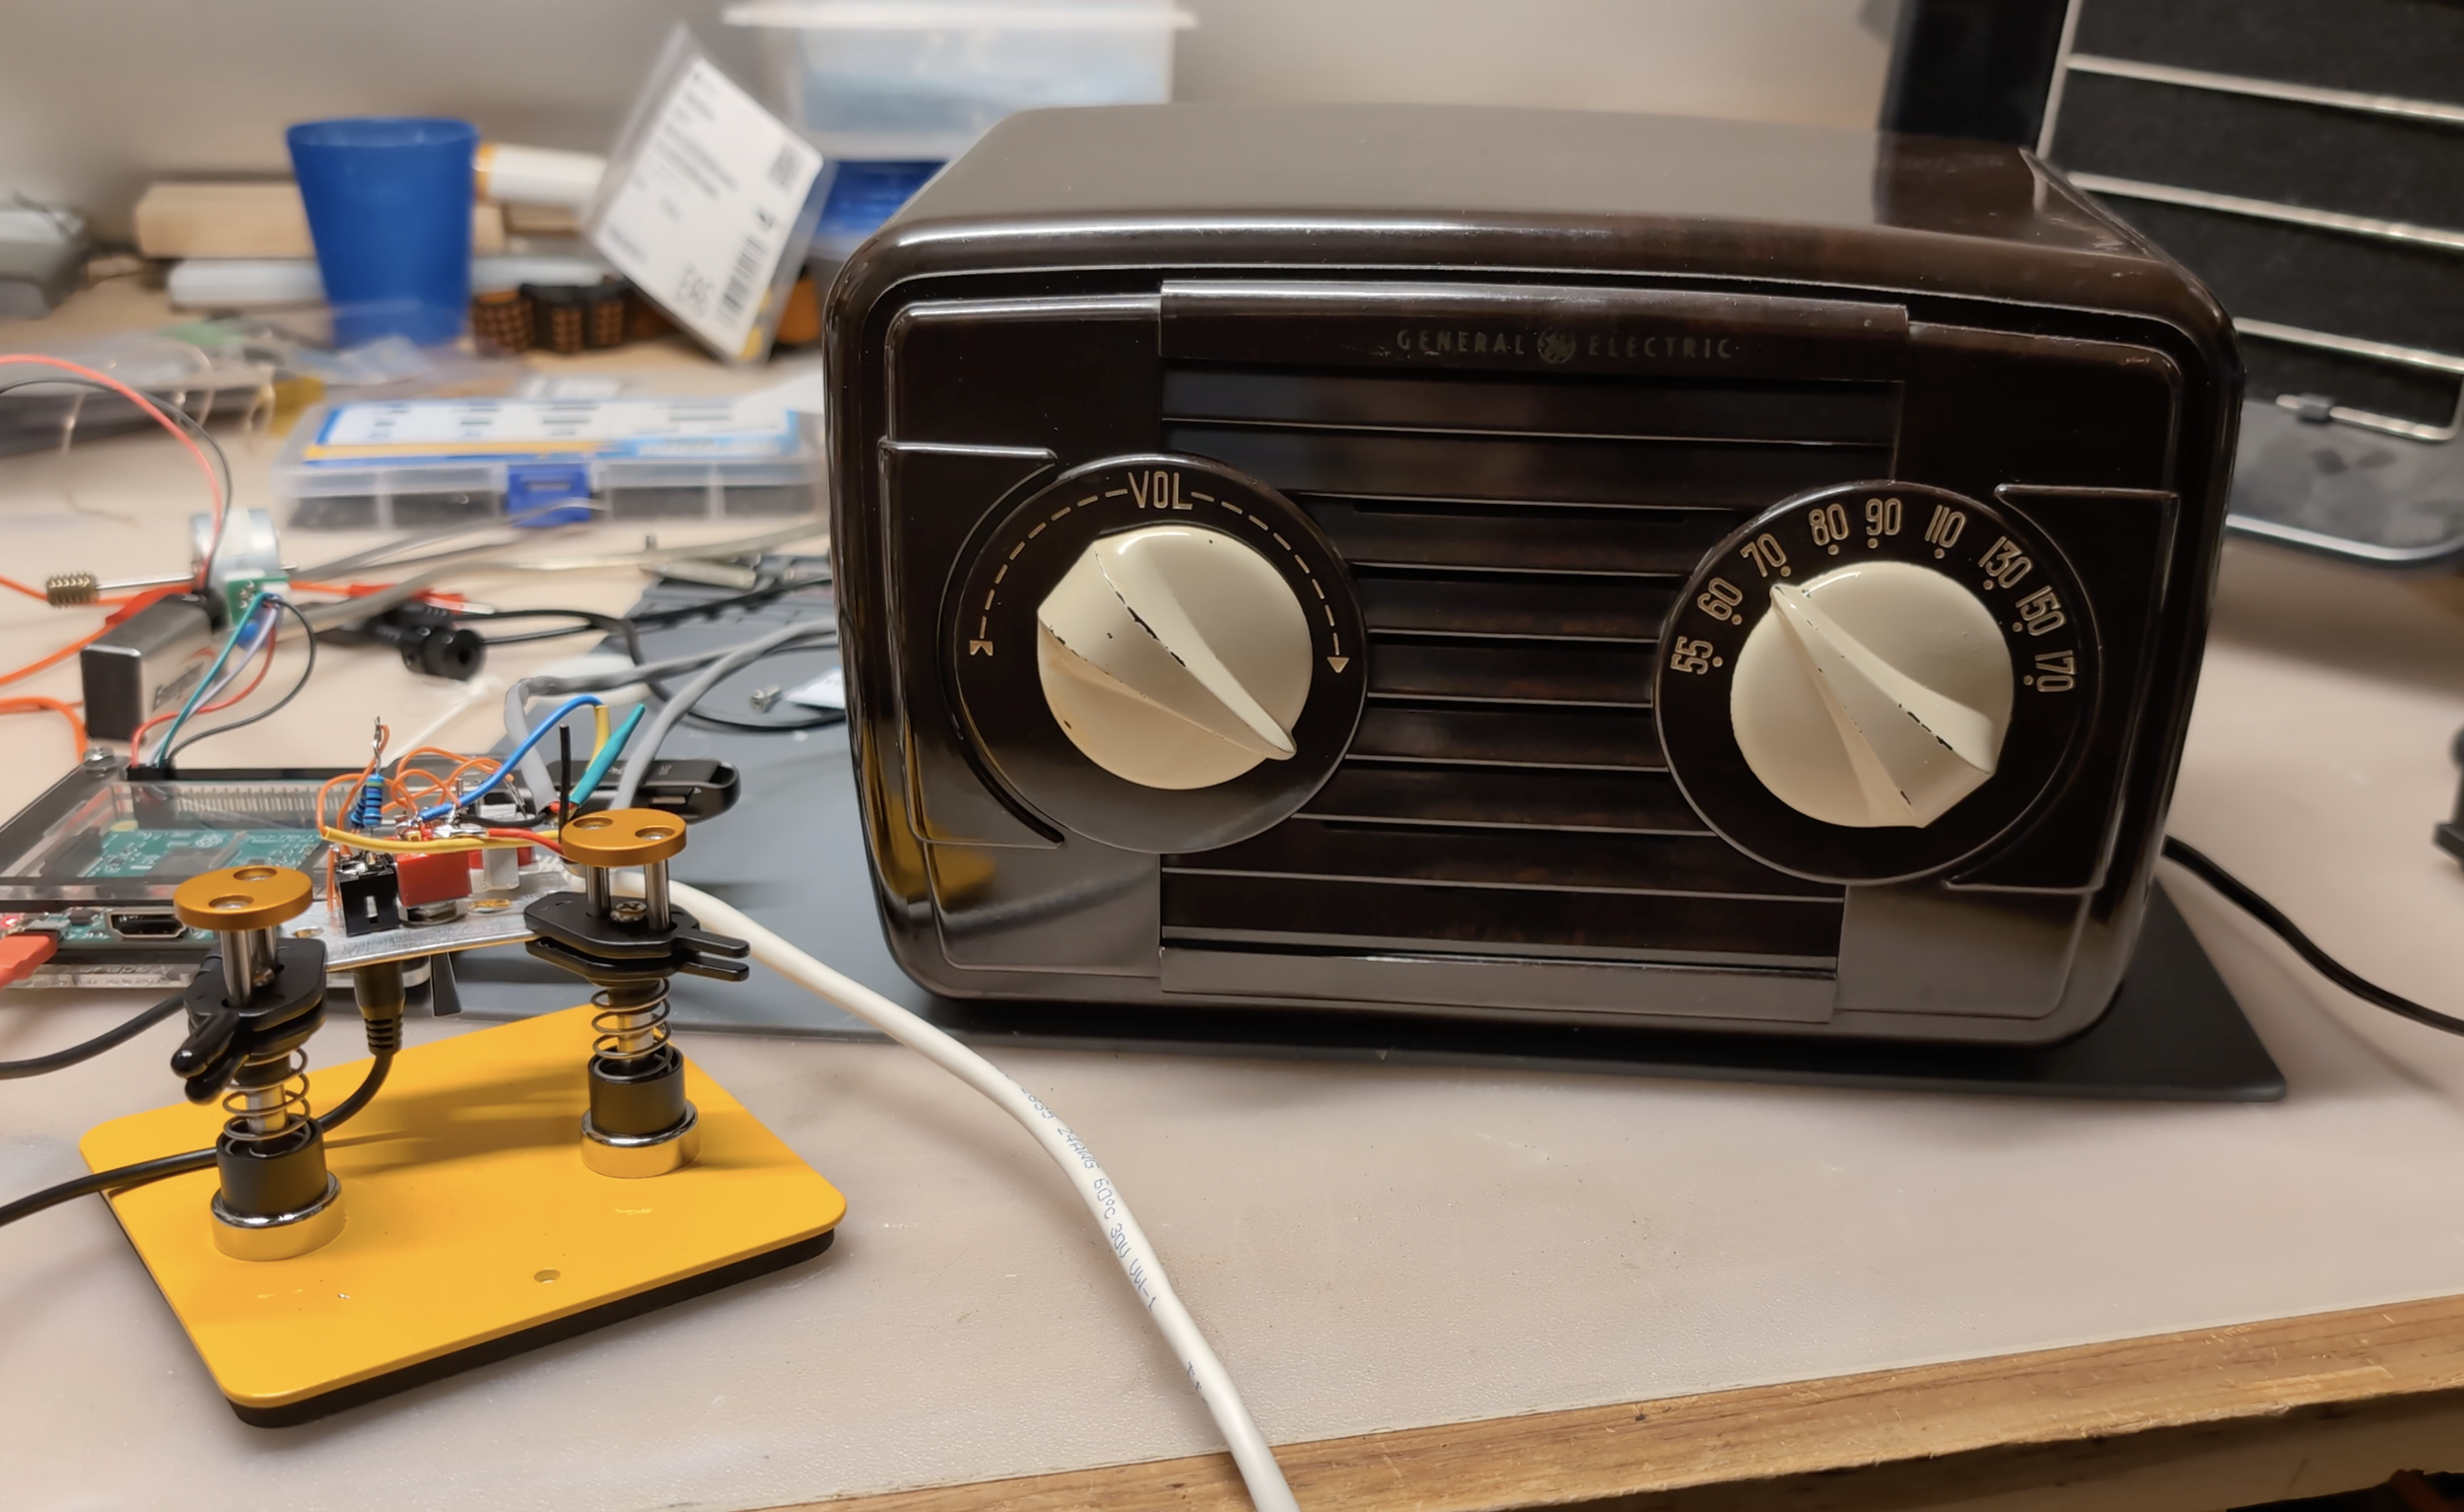
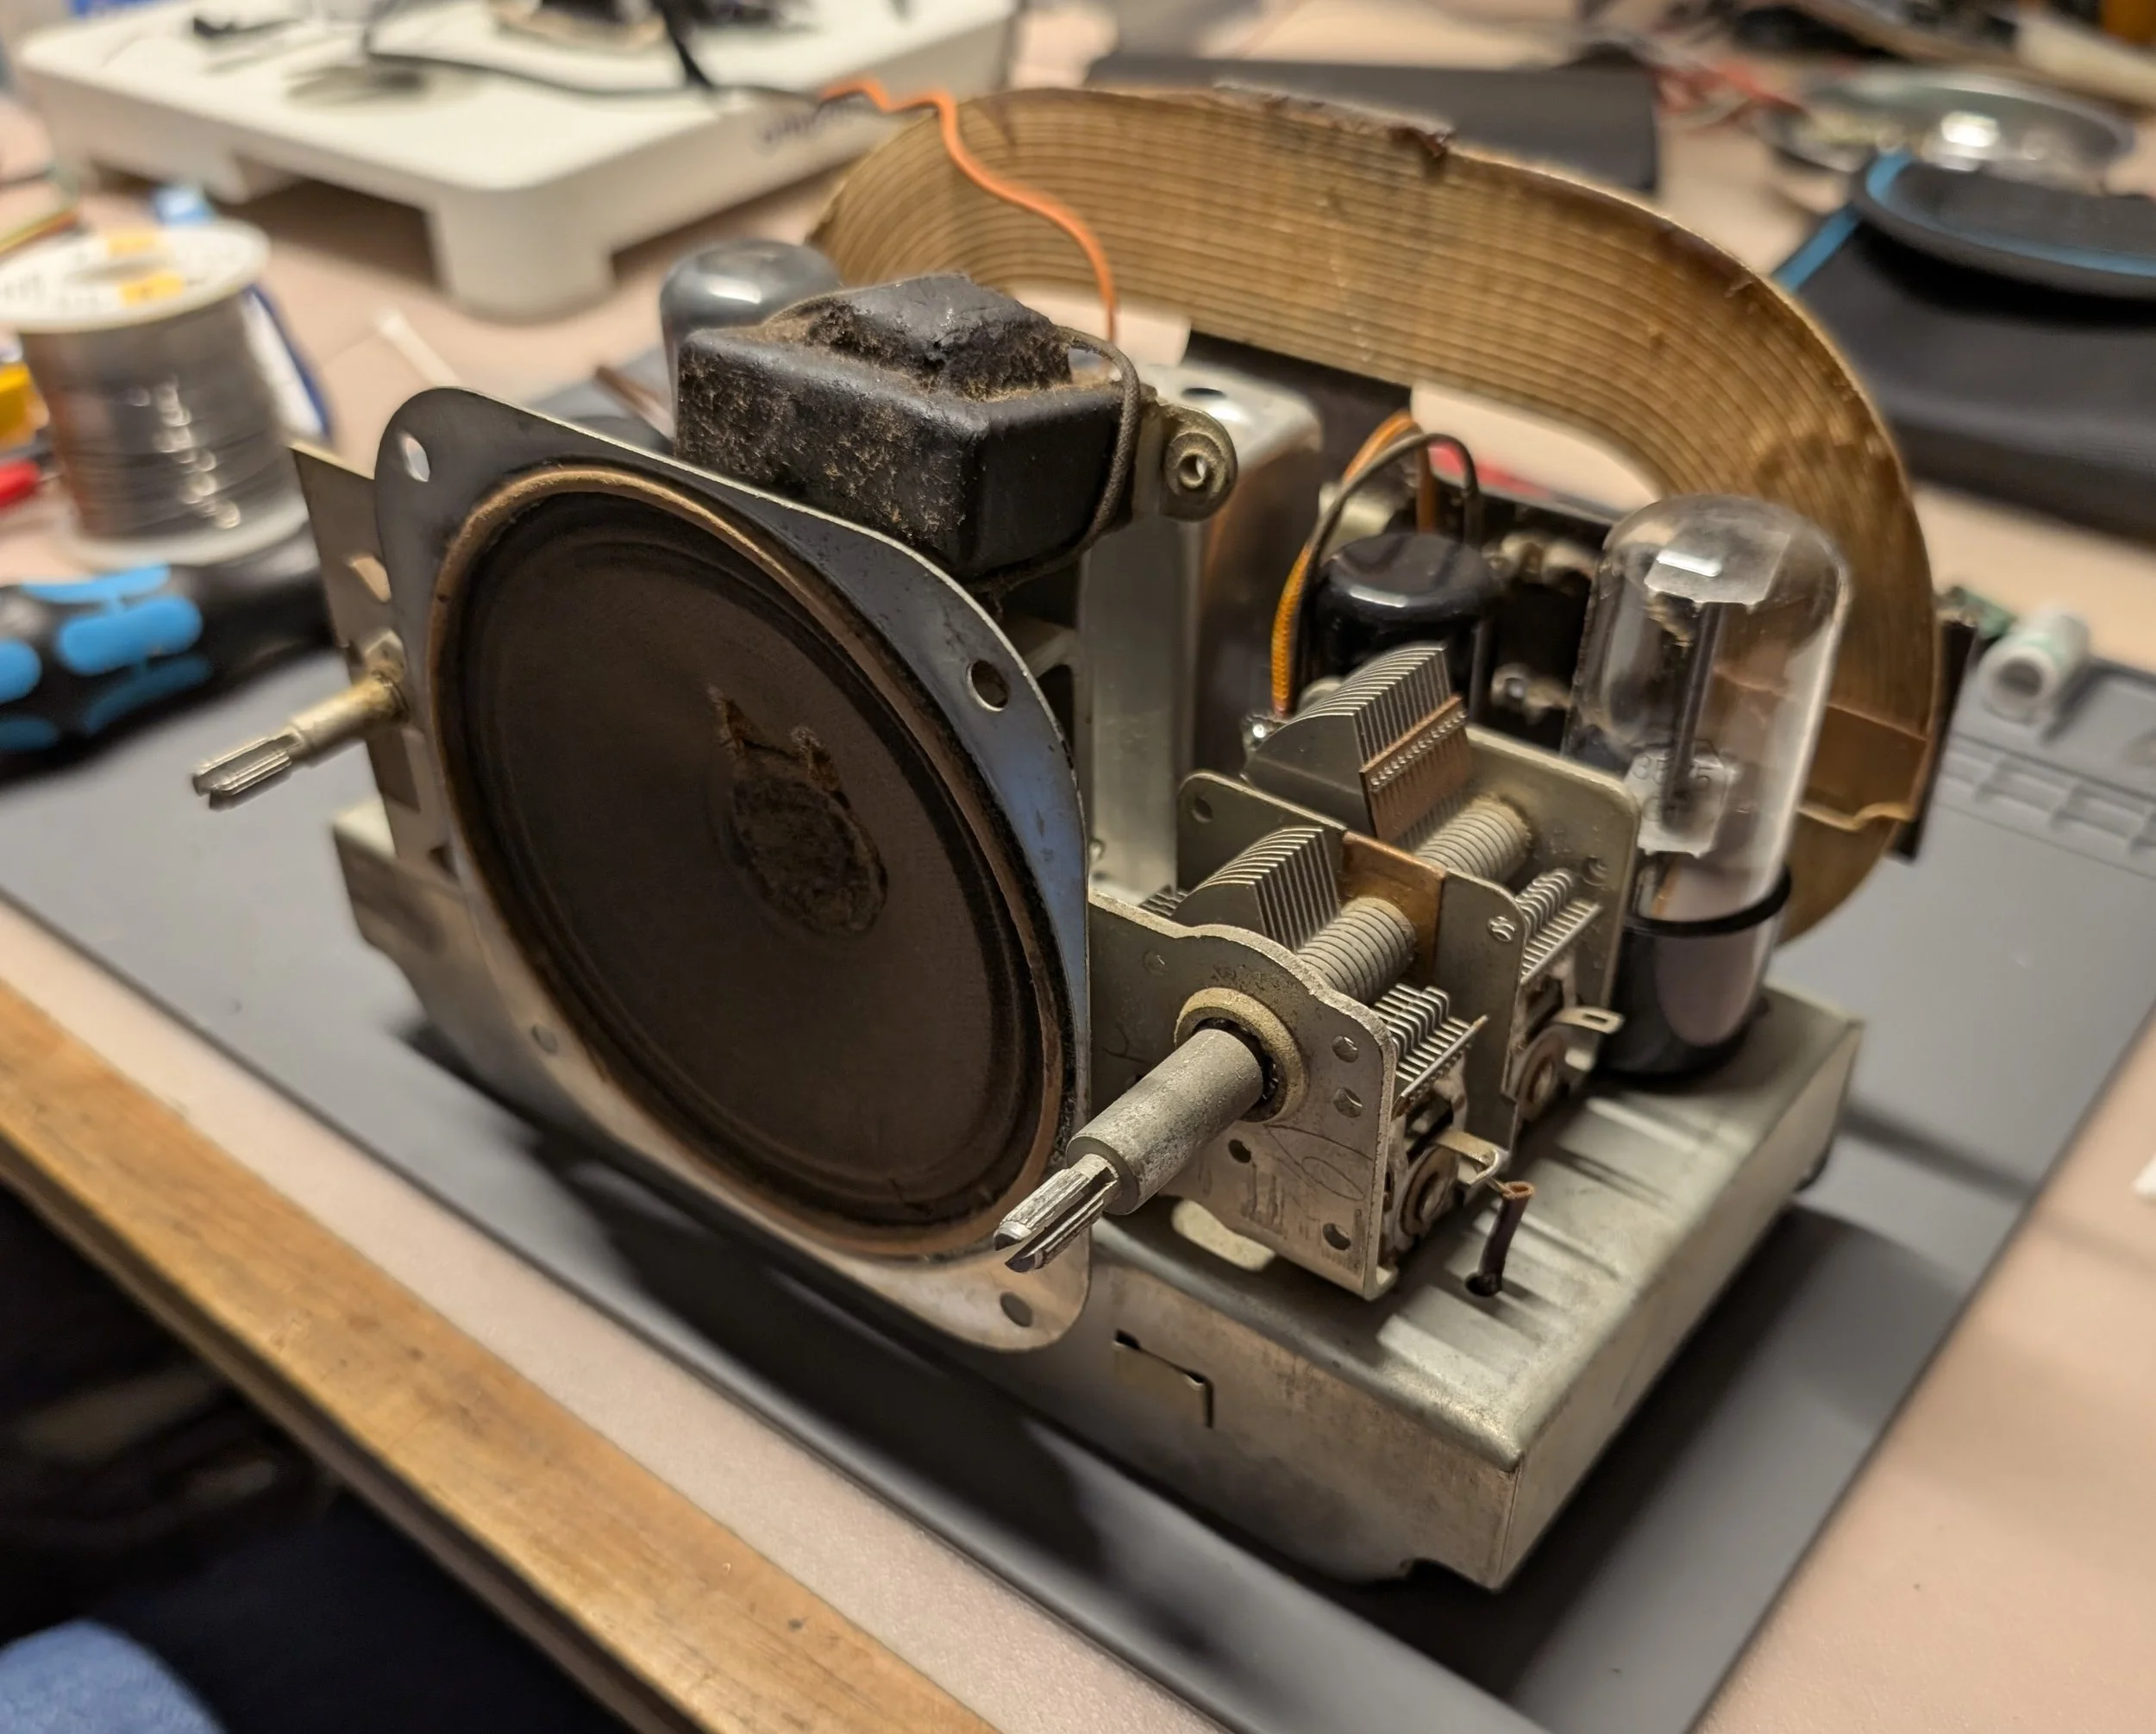
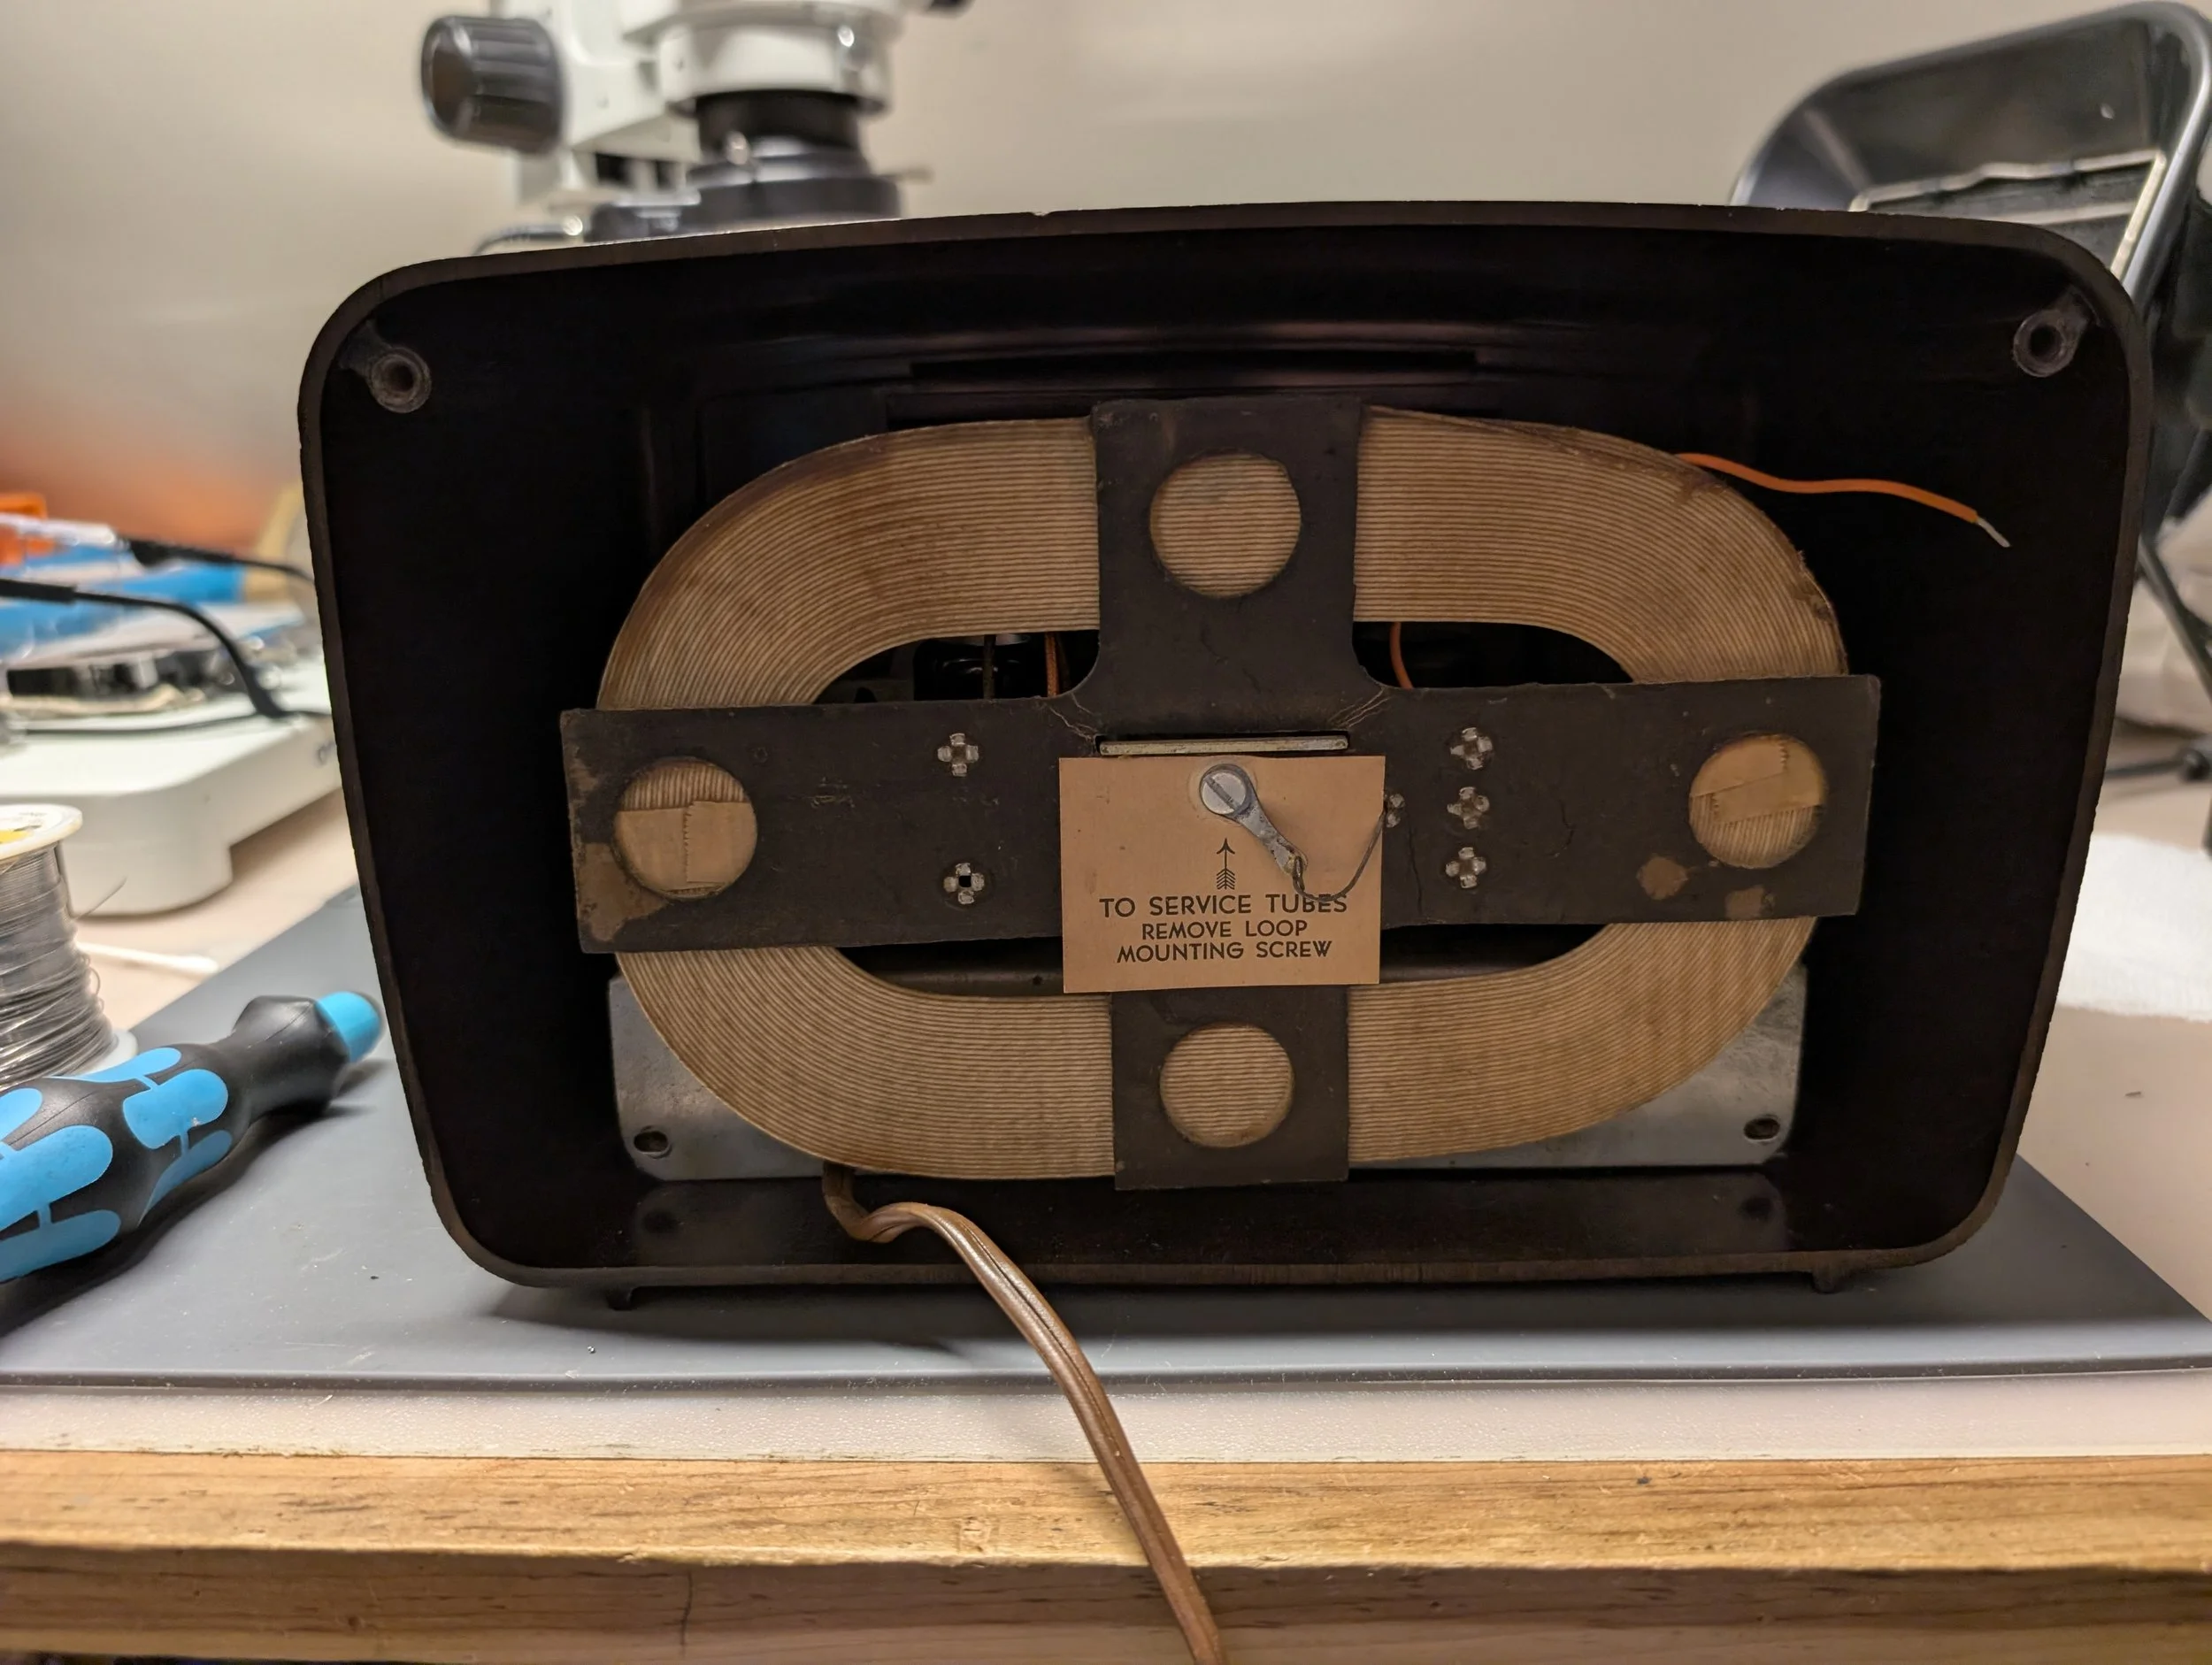
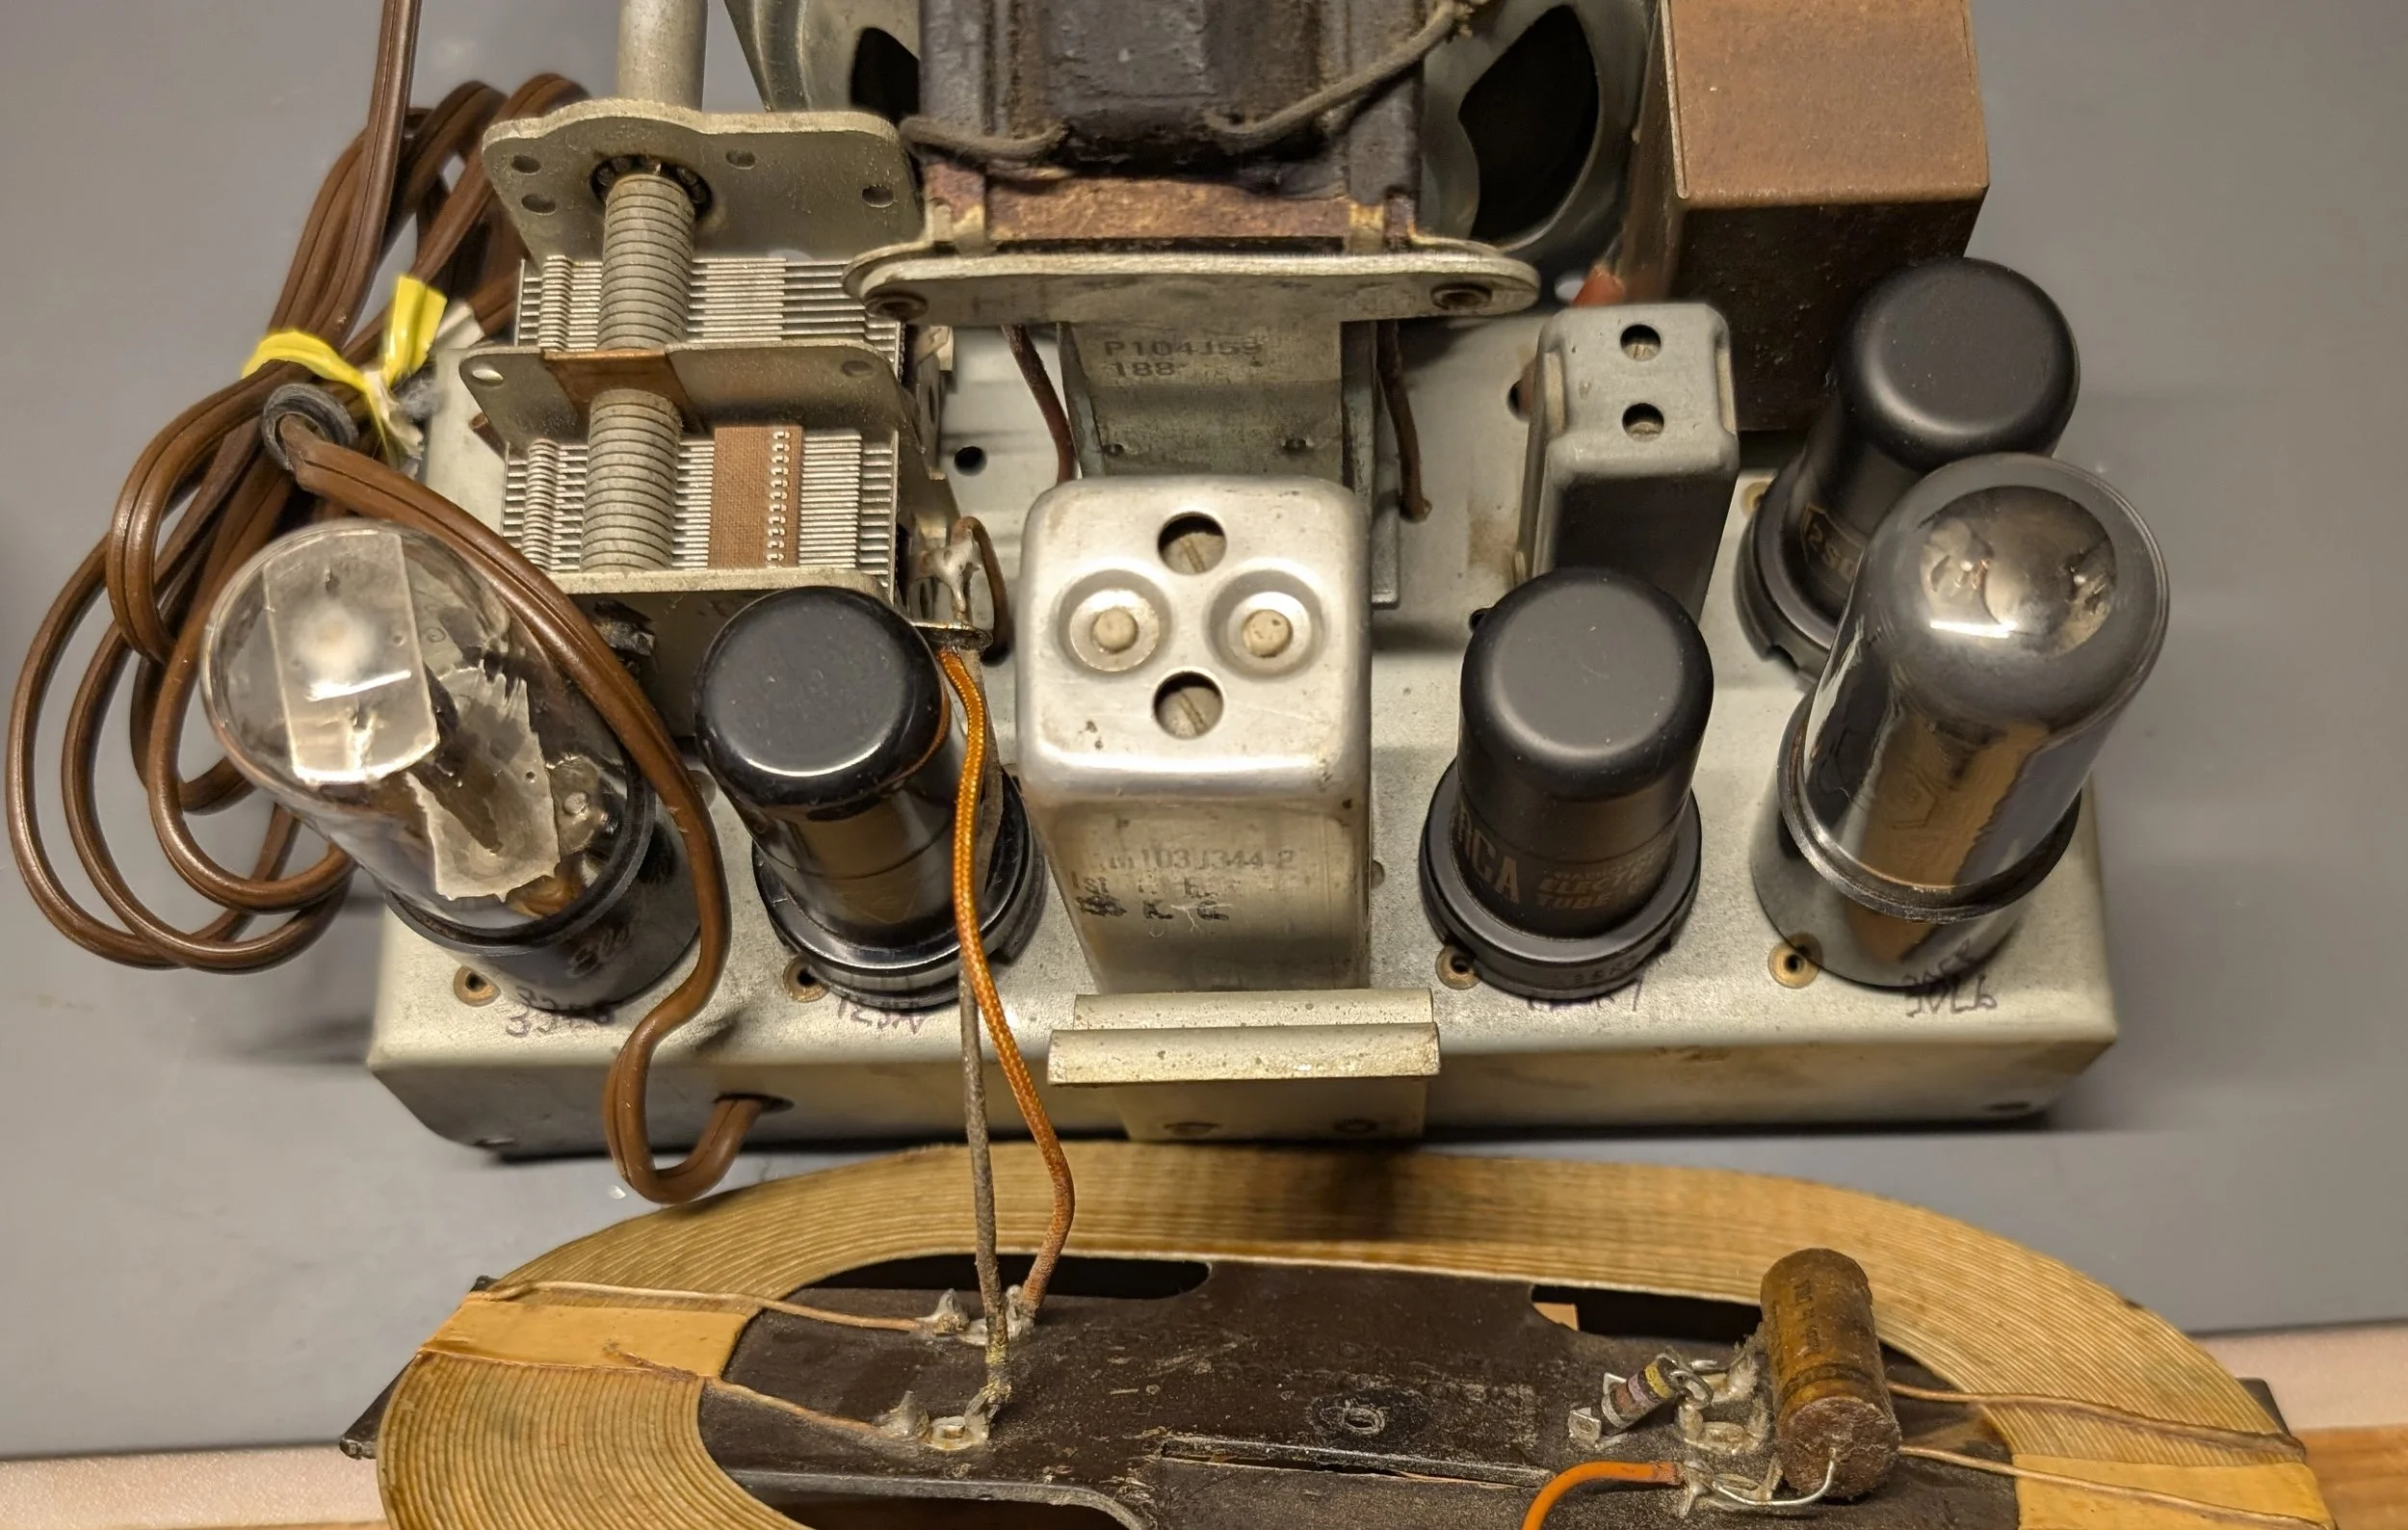
A few years ago, I purchased a 1948 GE 112 Table Radio at a ham radio festival. Filled with five vacuum tubes, I learned that this radio was part of a category called “All-American-Five” (or AA5) radios and would require an extensive restoration.
Now here’s the part where many folks probably expect (a young guy like) me to gut this poor old radio.
Despite reading about them regularly, I’d never had much exposure to real-world vacuum tubes before starting this project. But this winter, I decided to finally change that. I began by consuming everything I could find online about vacuum tubes and restoring old radios. There are some wonderful articles and YouTube channels dedicated to the subject. I also read several books on topic, both from the 1950s and the modern day.
I’m far from the first person to restore an old radio (although this kind of work is uncommon among those of my generation). I’m also not the first person to play old recordings through an old radio’s speakers. To me though, something about manually selecting a historical recording on a smartphone and hitting play just doesn’t have the same appeal as carefully turning a radio dial and hearing old voices gradually emerge from the static.
Inspired by some other radio simulation projects I discovered online, my dream was to use the original radio tuning dial to switch between a series of simulated radio stations comprised of historical recordings. What almost all these projects seemed to have in common however, was that they gutted the radio and replaced its innards with a Raspberry Pi.
My goal was to not only restore this old AM radio, leaving its vacuum tubes intact, but also provide it with modern functionality in the form of simulated old radio stations.
My project was comprised of three parts:
Restore the old radio, making it safe and reliable to use
Develop a simulation of historic radio stations
Build a way to safely and seamlessly toggle between AM radio reception and computer playback of recordings, while also using the original tuning dial as an input device for the computer simulation
Part I: The Restoration
I’ll begin by describing the restoration process. But first, a warning:
All American Five radios like mine were designed to be constructed affordably, and the safety standards of the 1940s were a far cry from what’s considered acceptable today. To this end, the metal chassis within my radio was originally considered “hot,” lacking meaningful electrical isolation from the risk of shocks. Depending on the polarization of the AC power cable, there was a 50% chance of the metal surfaces inside my radio being energized with live AC mains electricity. The original radio designers figured that if the radio had an insulated plastic (Bakelite) exterior and knobs, this design was safe enough. As this radio’s newest technician, I sought additional protection before starting this project, making sure to plug the radio into an external isolation transformer rather than the wall directly. This way, I could eliminate the risk of getting shocked by touching the tuning knobs or fiddling with the radio.
I replaced the radio’s original frayed power cord with a modern polarized alternative. Using wide and narrow prongs, this new plug is unable to be connected backwards across an AC power outlet, reducing the chance of the hot chassis shocking users, even without an isolation transformer (assuming the household wiring is up to code). I also added a fuse to the radio (not pictured) for additional safety.
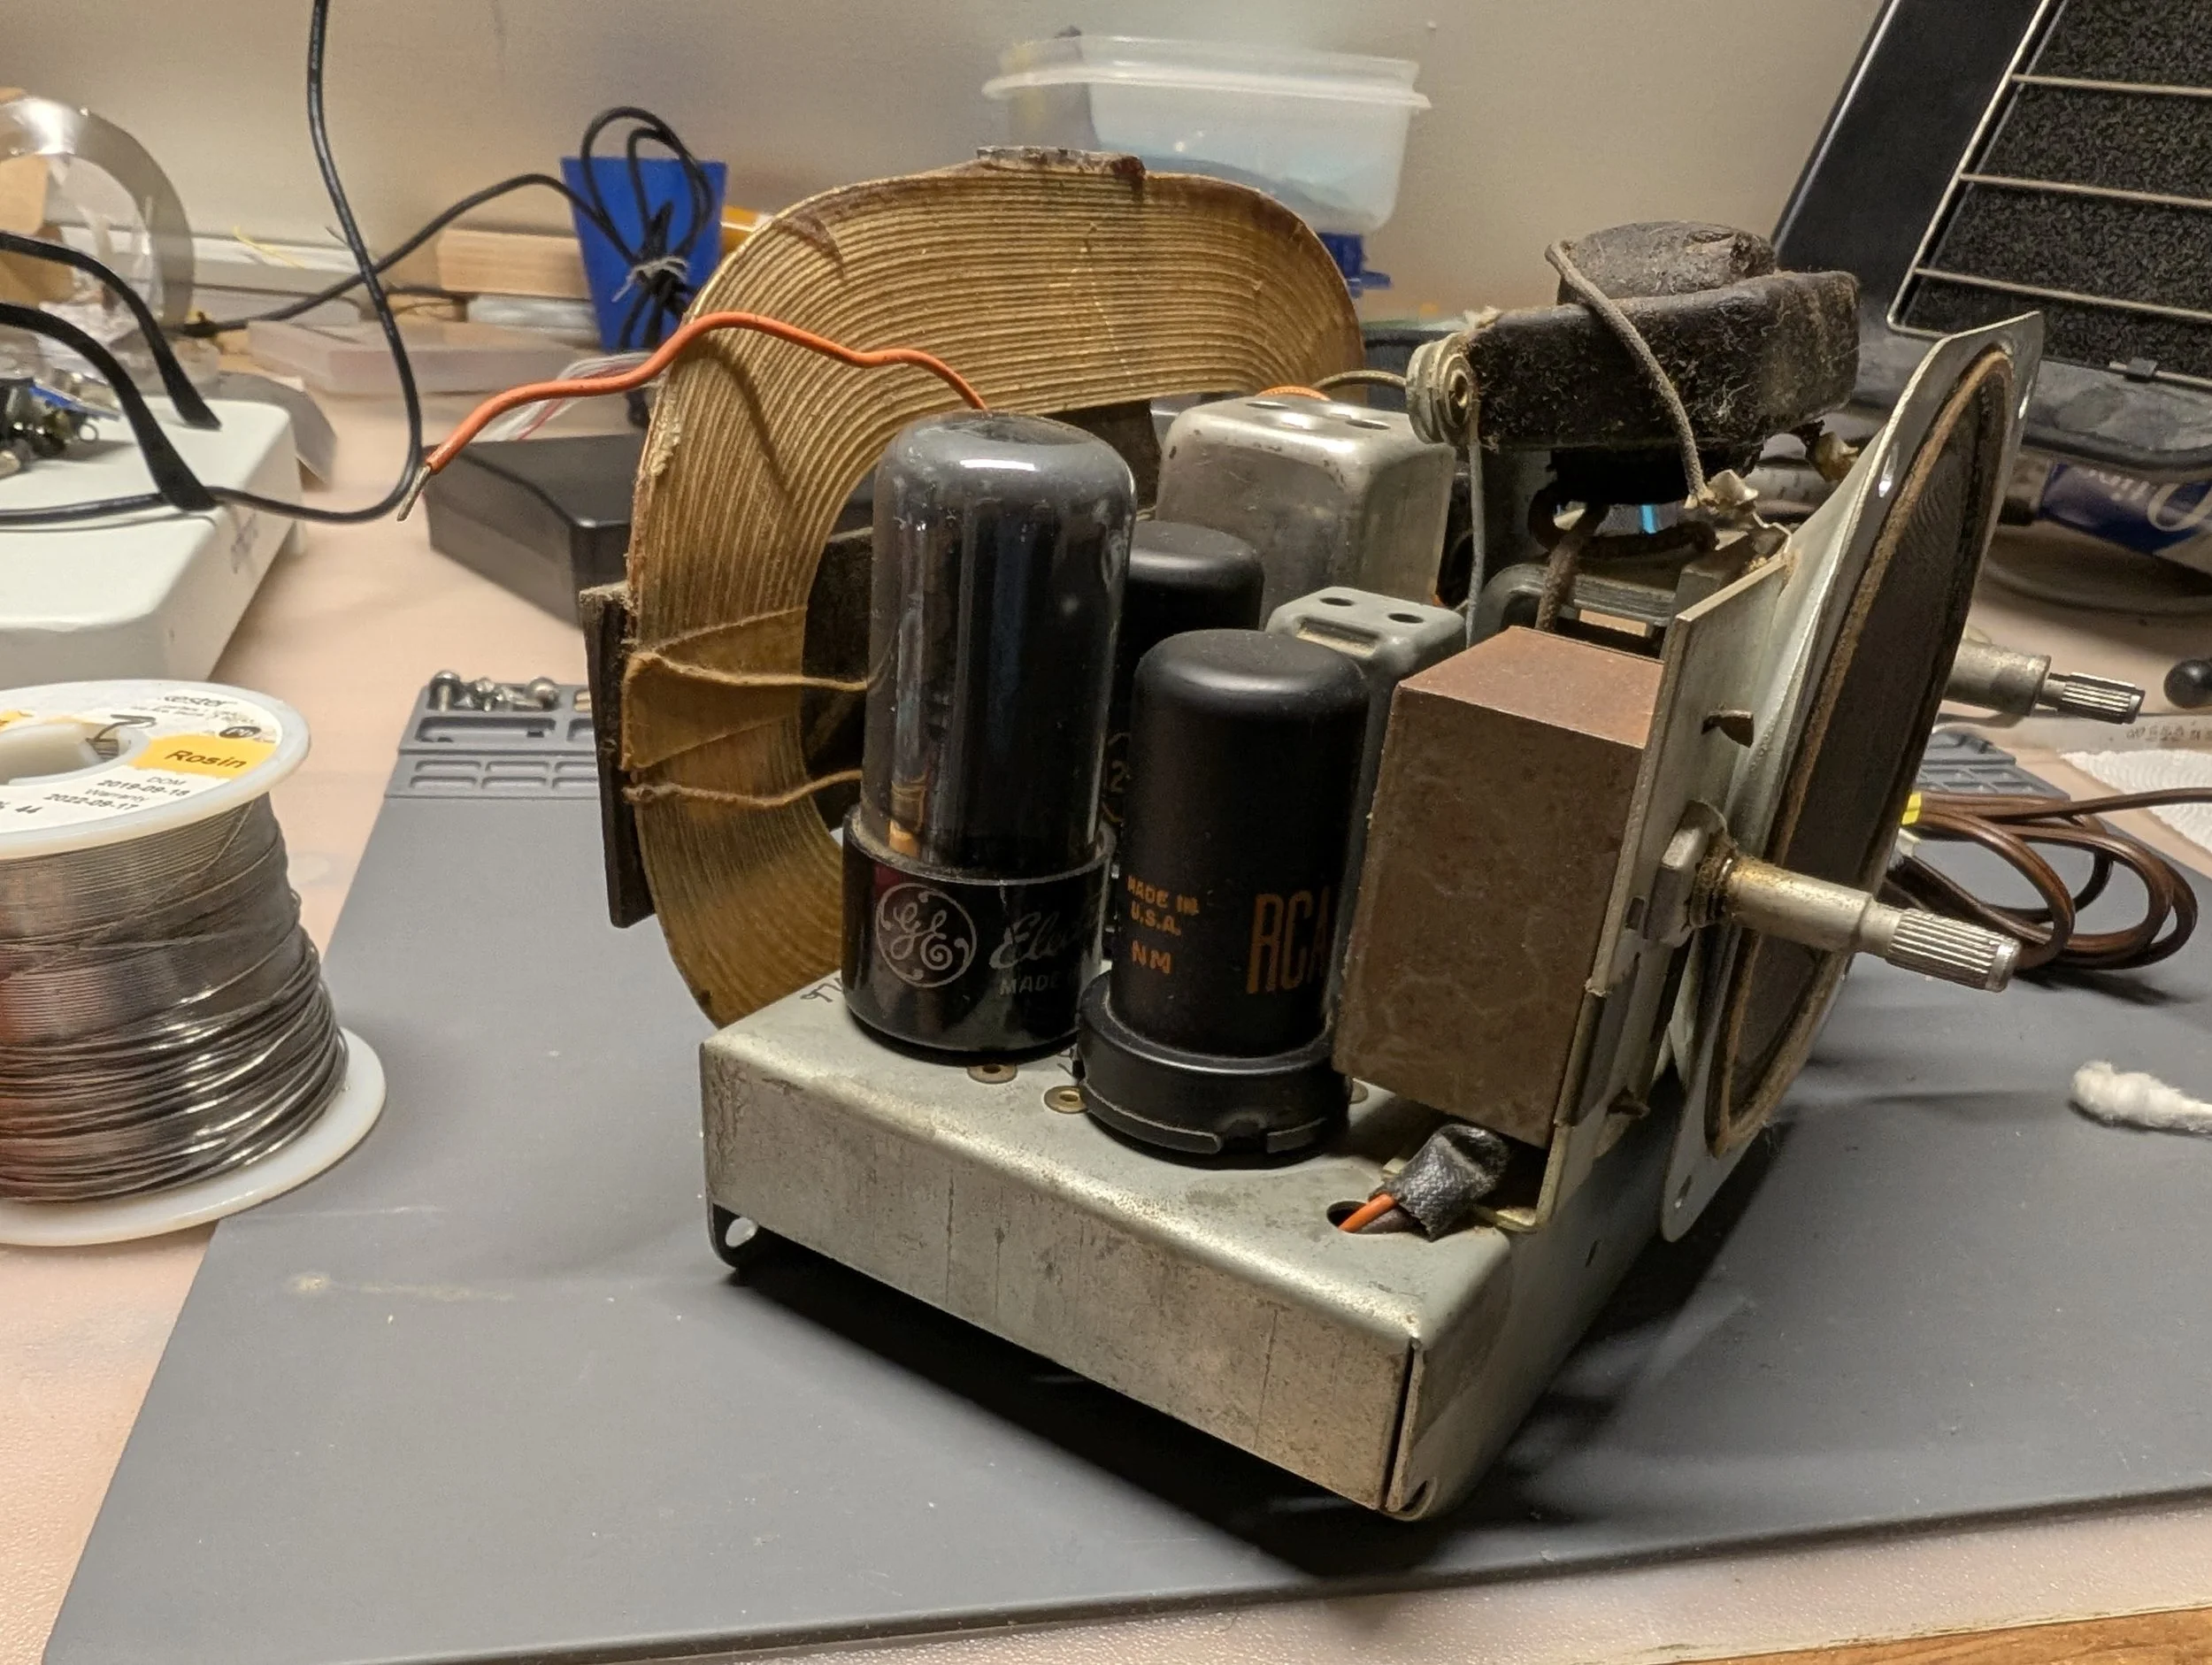
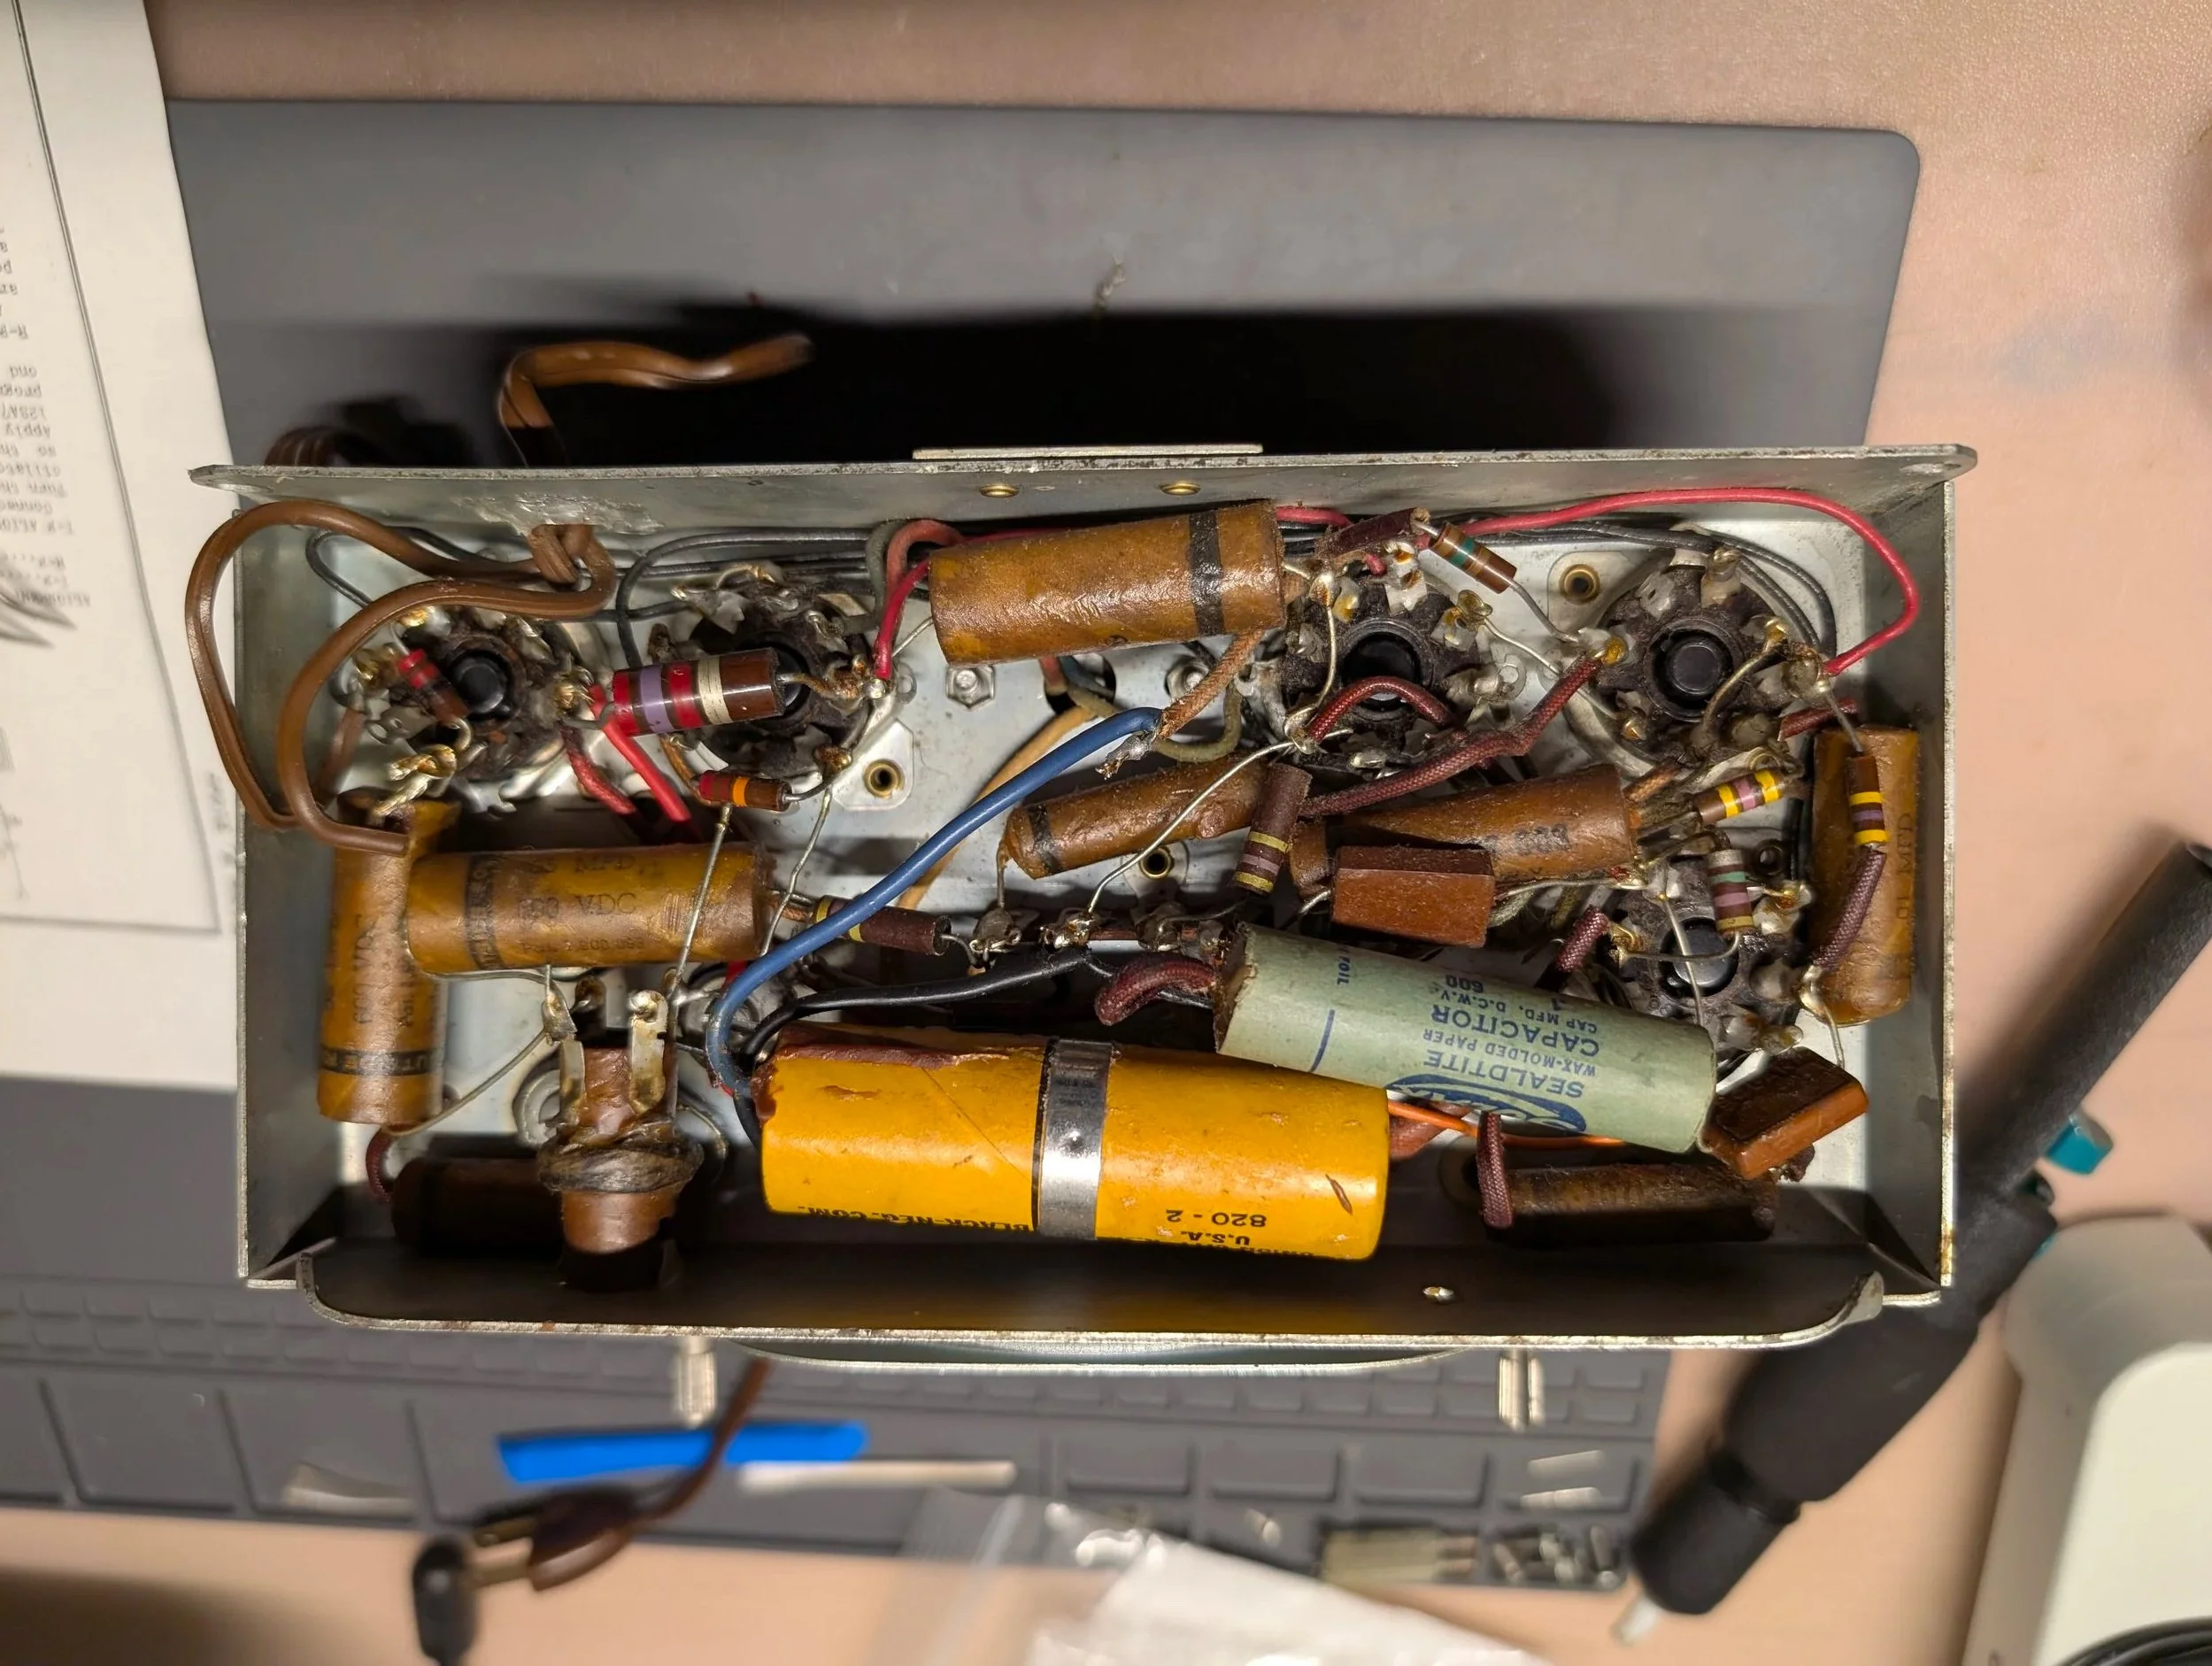
Most capacitors from 1948 are no longer up to spec and thus are unsafe to use. My radio’s original wax capacitors had turned into resistors with age, and the original electrolytic capacitors had long since dried up, leaving only some leaky crystalized remnants of electrolyte behind. I had to painstakingly replace almost every single capacitor in the radio chassis with modern alternatives. (The exceptions were two mica capacitors which are very unlikely to fail.)
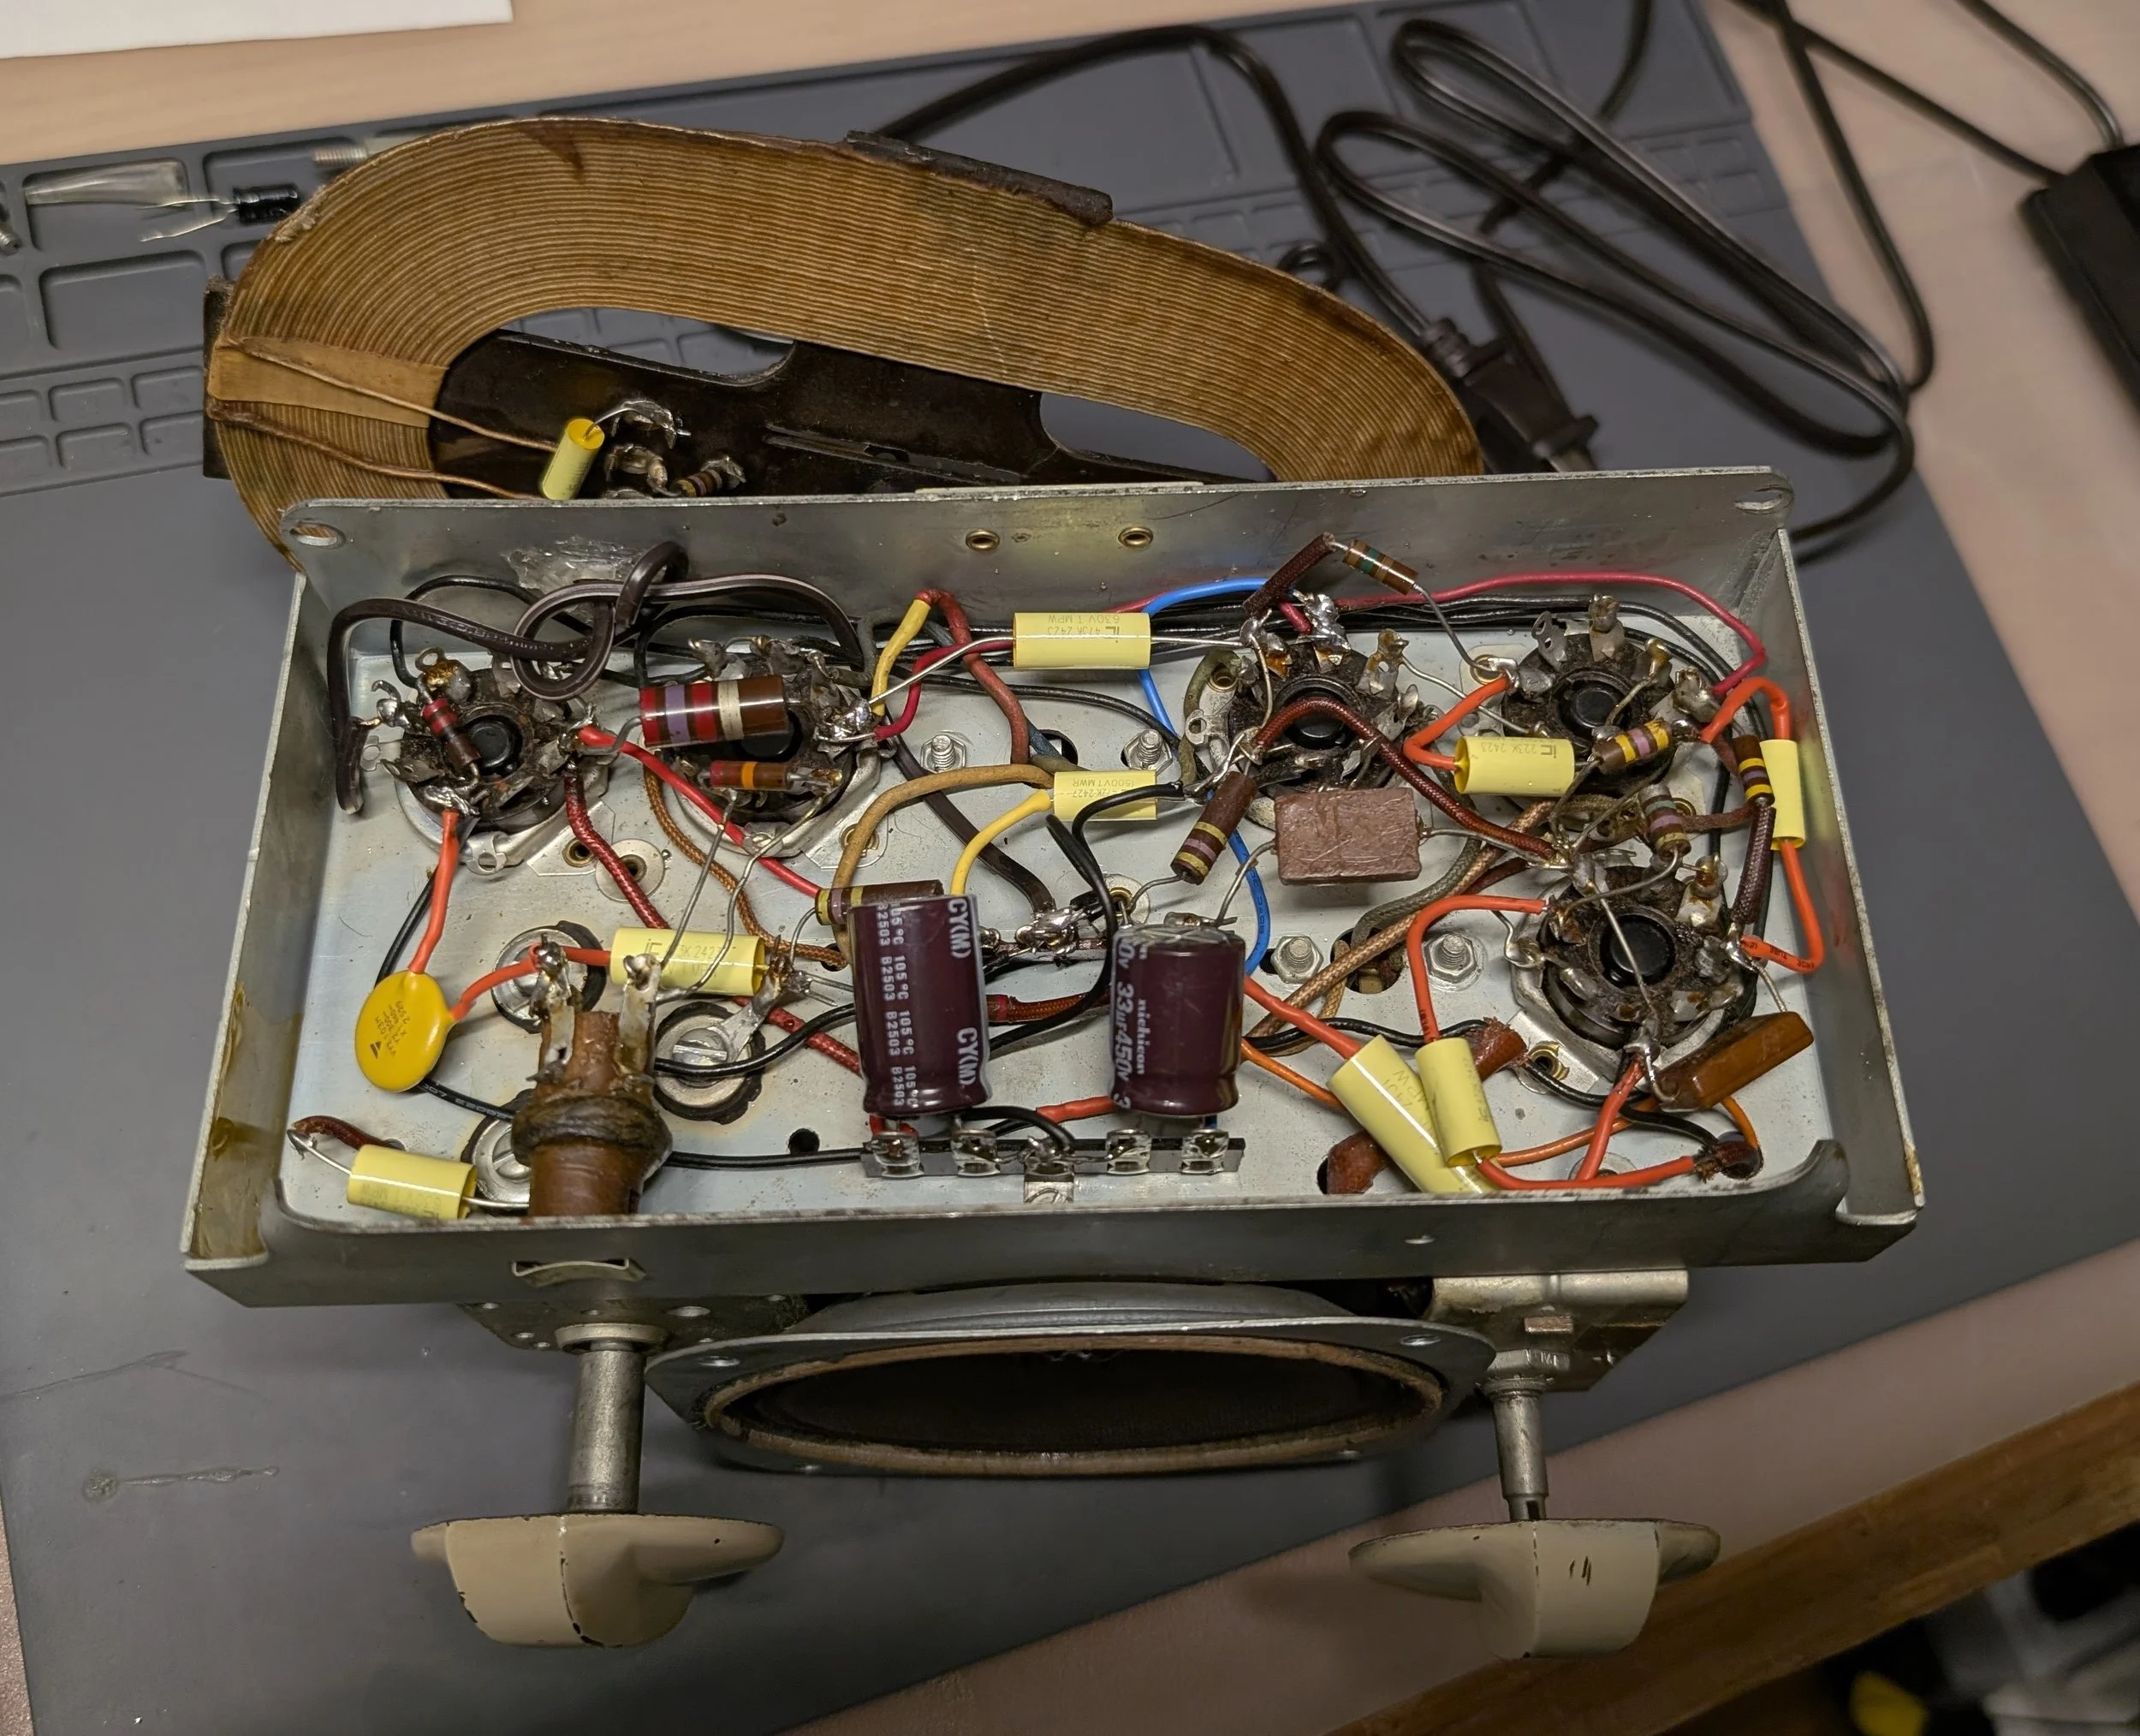
I opted for 630V polypropylene film capacitors. I also used high-quality, high temperature-rated Nichicon electrolytic capacitors mounted to a piece of terminal strip. Thankfully I learned that due to the analog nature of my radio, if the capacitance rating of a replacement part is “close enough,” the radio will still work fine. This made it easier to substitute modern replacements when exact values were too tricky to find.
One important capacitor that I did NOT replace according to the original specification was mounted across the AC power input. I learned it is important to use what’s called a X-class “safety capacitor,” rather than just another polypropylene film cap. These safety capacitors filter out modern noise emitted by switch mode power supplies located elsewhere in a home’s wiring. Funnily enough, these are the same kind of components frequently replaced with modern alternatives inside vintage switch mode power supplies. I was already familiar with these parts, as in unrestored vintage Macintosh computers, “RIFA” brand safety capacitors have an infamous reputation for failing dramatically.
I was extraordinarily lucky. After replacing all my radio’s capacitors and rewiring it for modern safety standards, I plugged it into my isolation transformer, and it worked the very first time! Before I even performed an alignment (which increases a radio’s sensitivity and selectivity,) I was able to receive AM radio broadcasts from hundreds of miles away. To my shock, from my workshop in Pennsylvania, I picked up French radio from Montreal in addition to stations as far away as Illinois, Michigan, New Hampshire, Massachusetts, Kentucky, and North Carolina.
The next stage of the project was adding a safe way to input external audio into my radio, effectively bypassing the AM tuner, and using the radio as a glorified audio amplifier. I used shielded wire, an audio isolation transformer, a 3.5mm audio socket, and a dual-throw double-pole switch to complete this modification. I followed the excellent plans written by Richard Whipple here. With the flip of a switch, I could now toggle between listening to live AM radio or auxiliary music sent from my iPod. I was now ready for the next phase of this project.
Part II: Simulating Historic Radio Stations
While I have a great appreciation for the AM radio technology inside this device, listening to modern AM broadcasts doesn’t particularly appeal to me. I’d much rather hear recordings of Fred Astaire, Jack Benny, or “The Shadow,” than hear modern talk radio or pop music coming out of my newly restored radio’s speaker.
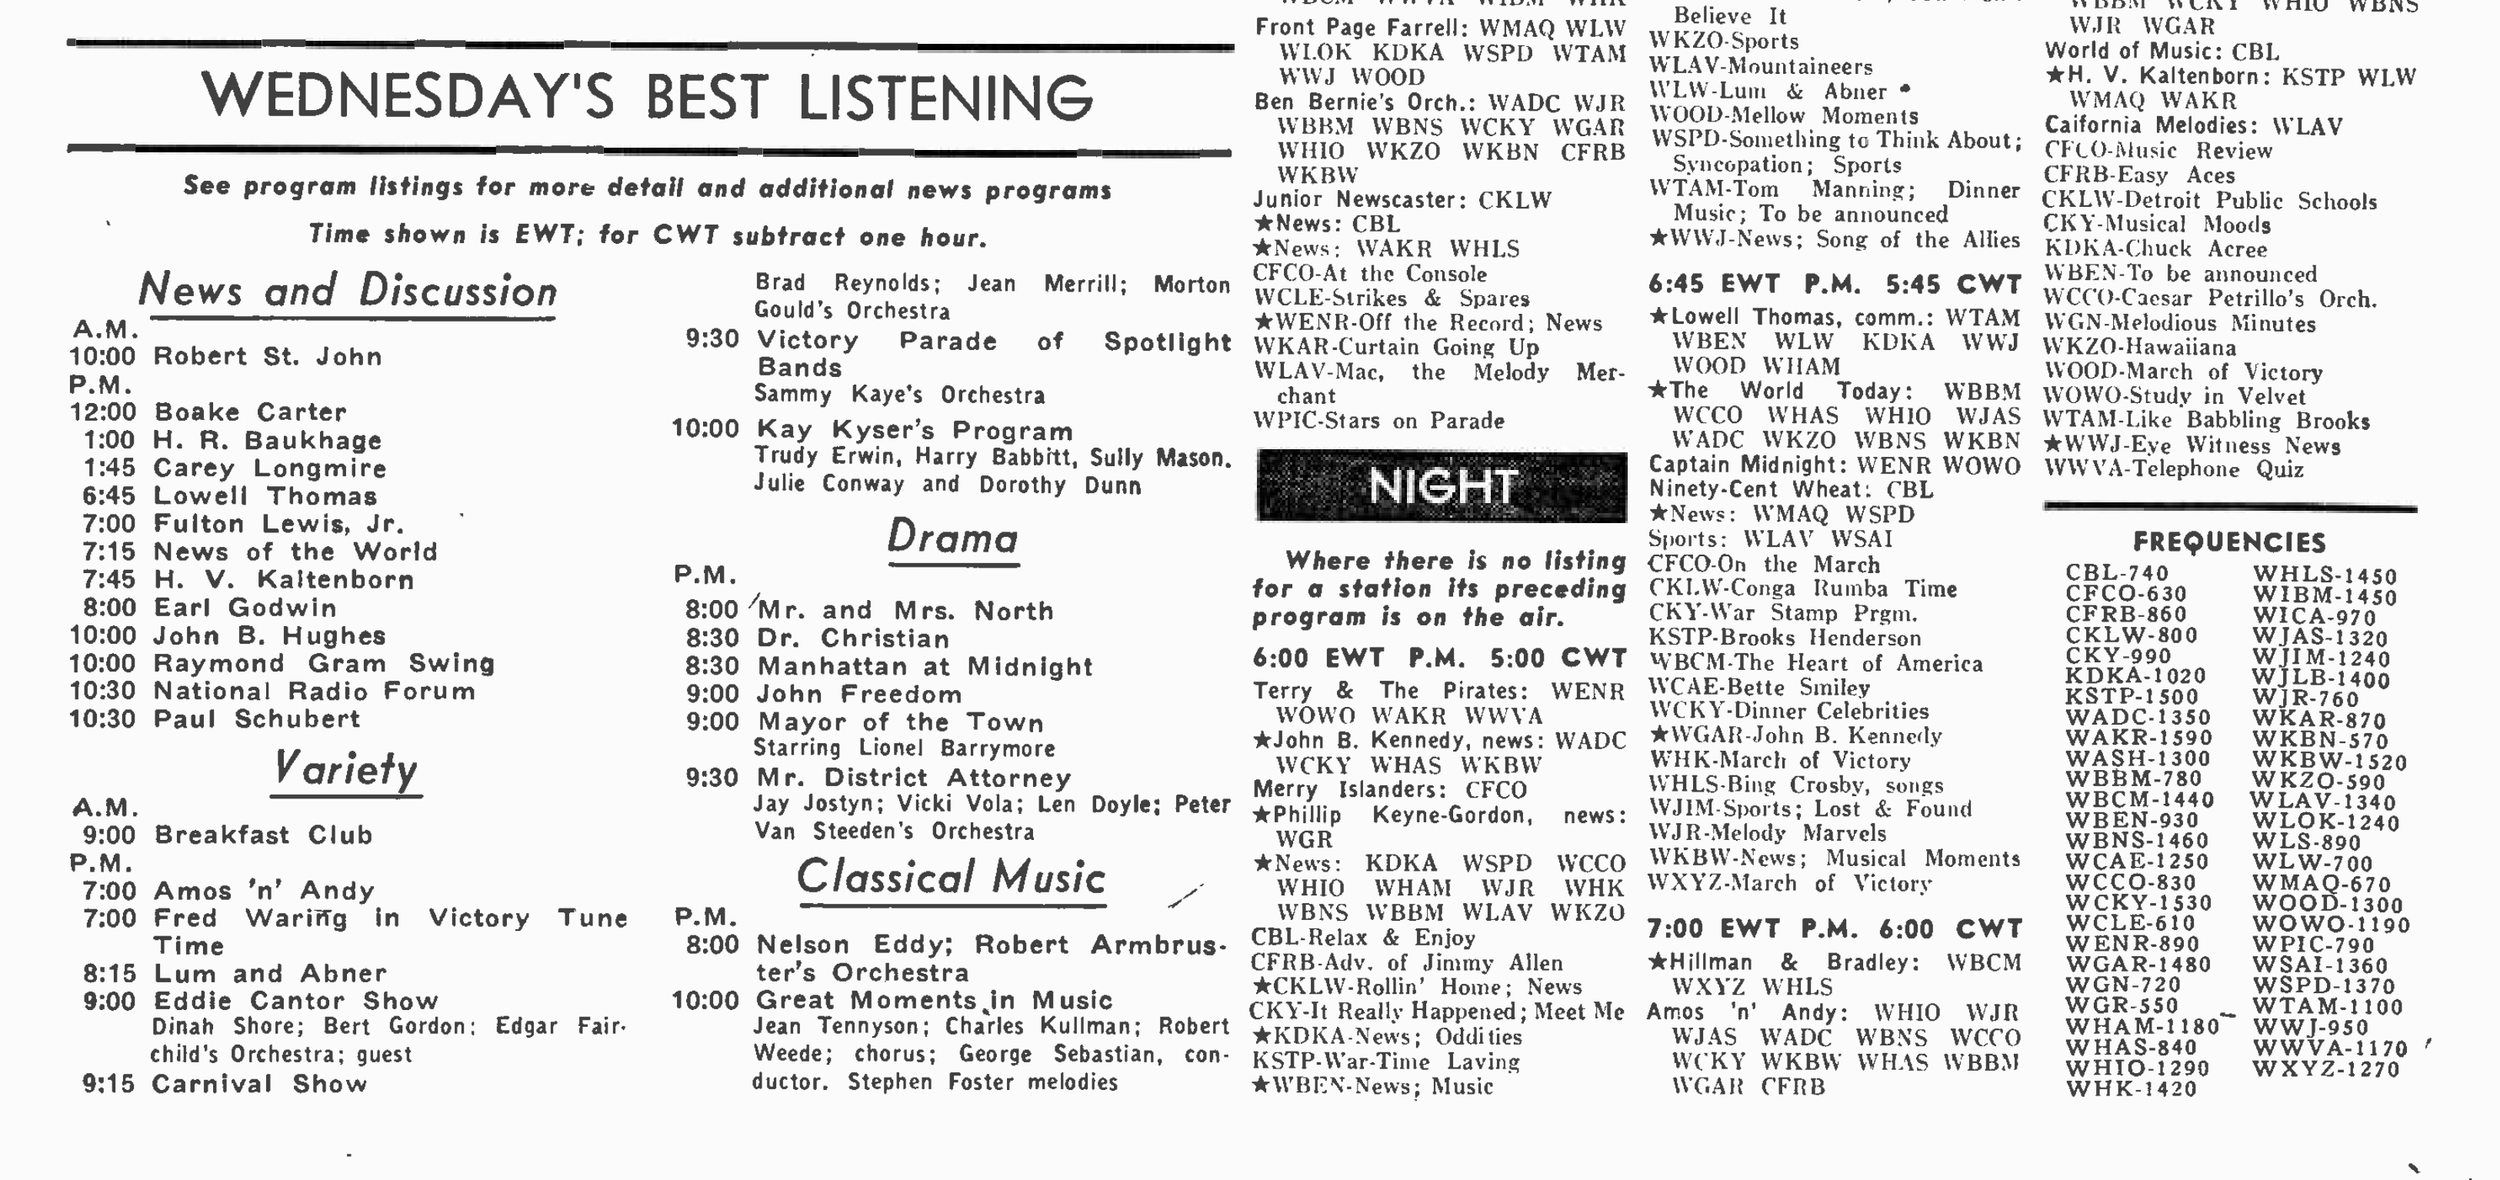
I consulted a radio guide from 1943 to get a taste for what kinds of programming used to be on air.
I was largely inspired by Shane Mason’s excellent “FieldStation42” project, which aims to provide an accurate simulation of cable TV in the 1990s, complete with support for several highly configurable stations, advertisements, bumpers, and advanced program scheduling features. With Shane’s help, we were able to adapt FieldStation42 to work as the backbone of my radio simulator project. FieldStation42 now supports playback of audio files in addition to video clips.
What really helps sell the effect is that stations are aligned to a timetable. This way, time appears to pass when switching between stations. If I start listening to a song on station 1 and then switch to station 2, switching back to station 1 resumes playback mid-song. This behavior is based on how much time has elapsed since tuning to station 2, rather than starting over from the beginning of the song or switching to a new song entirely.
Incredibly, there are thousands of meticulously organized, digitized, and freely available recordings of old radio content available online. Sourcing “Old-Time Radio” content from the Internet Archive and the Old-Time Radio Researcher’s group, I was able to custom develop a lineup of radio stations that suited my tastes. I consulted some of the older people in my life for their favorite radio shows. For music, I made extensive use of my grandparent’s CD collection.
I painstakingly configured several radio stations:
There are a few music stations which can be configured to play music from different genres or eras as I please. I’ve confined the music to the 1930s, 1940s, and early 1950s. (If I hear Rock or “The Beatles” coming out of this radio, it’s just too modern.) A few times each hour, the music is punctuated by brief historical ad segments.
Stations play several genres of radio shows.
There are Adventure/Western shows like “The Shadow,” “The Lone Ranger,” and “Dragnet”
There are comedy broadcasts like Abbott and Costello, Jack Benny, and “Fibber McGee and Molly”
There are also soap operas, dramas, children’s programs, and a few other genres sprinkled in.
I created several news stations which play a collection of notable news broadcasts. I have experimented with a station that only plays news from 1948, the year this radio was built. But I’m not terribly picky and use news recordings within about 5-7 years of 1948. I try to keep the collection weighted towards the earlier years, rather than including things from the 1950s.
Depending on the hour, sometimes the radio is configured to play President Roosevelt’s Fireside Chats
To keep listeners on their toes, I even stuck a copy of Orson Welles’s infamous “War of the Worlds” Mercury Theater broadcast into the legitimate news folder!
I also found a complete ~20-hour recording of the radio broadcasts on D-Day, and I’ve experimented with using those as their own time-synced station. This way, 8:00AM in 1944 plays at 8:00AM in 2026. I think this radio can provide a very immersive and interesting way to experience/learn about historical events.
One station plays nothing but vintage radio advertisements. When demonstrating the radio to others, it’s a lot of fun to spin the dial and hear the announcer try and sell you a 1950s Chevrolet or hear why “More Doctors Smoke Camels.”
Another fun experiment was making a station that plays recordings of some of the best old baseball games from the ‘30s, ‘40s, and ‘50s.
It’s fun to hear Babe Ruth, Lou Gehrig, and some of the other old stars play ball. On my radio, the Dodgers are back in Brooklyn, and the Athletics are in back in Philadelphia.
Part III: Using the original tuning knob
I developed a custom script for use with FieldStation42 which makes it feel more analog, as opposed to the digital feeling of changing channels on a TV remote. I added support for a hall-effect angle sensor-based tuning knob, and I wrote code to inject radio static noise as I tune between stations. Noise gets louder the farther away the tuning knob is rotated from a given station. Once the dial starts getting closer to a new station, the static noise gradually ramps down until the new station is centered on the dial. I also added support for two virtual "layers/bands" of stations so I can toggle between historical simulated stations and modern internet radio streams. I didn’t want to mix these stations together, as it otherwise distracts from the “time machine” effect I sought out. If I rotate the tuning knob all the way to the end of the dial and I let it sit there for a few seconds, eventually a “beep” sounds through the speaker. After this, the historical radio stations are remapped to be modern internet radio streams, including my local FM radio stations and the BBC World Service. I can return FieldStation42 to historical simulation mode at any time by rotating the dial to the same toggle position. And of course, I can also flip a switch at the back of the radio and listen to modern AM broadcasts at any time too.
I am running FieldStation42 on a Raspberry Pi 3. The I2C connections from the hall-effect sensor are directed into the GPIO pins. I eliminated the need for a redundant Arduino. I didn’t need the additional horsepower of a more modern Pi, as this project is audio only. I didn’t attempt to mount the Pi within the tight confines my radio’s chassis. This would only serve to add additional RF interference, and it doesn’t bother me to hide the Pi behind the radio on my desk. I’m perfectly happy not powering the Pi from the radio’s wiring.
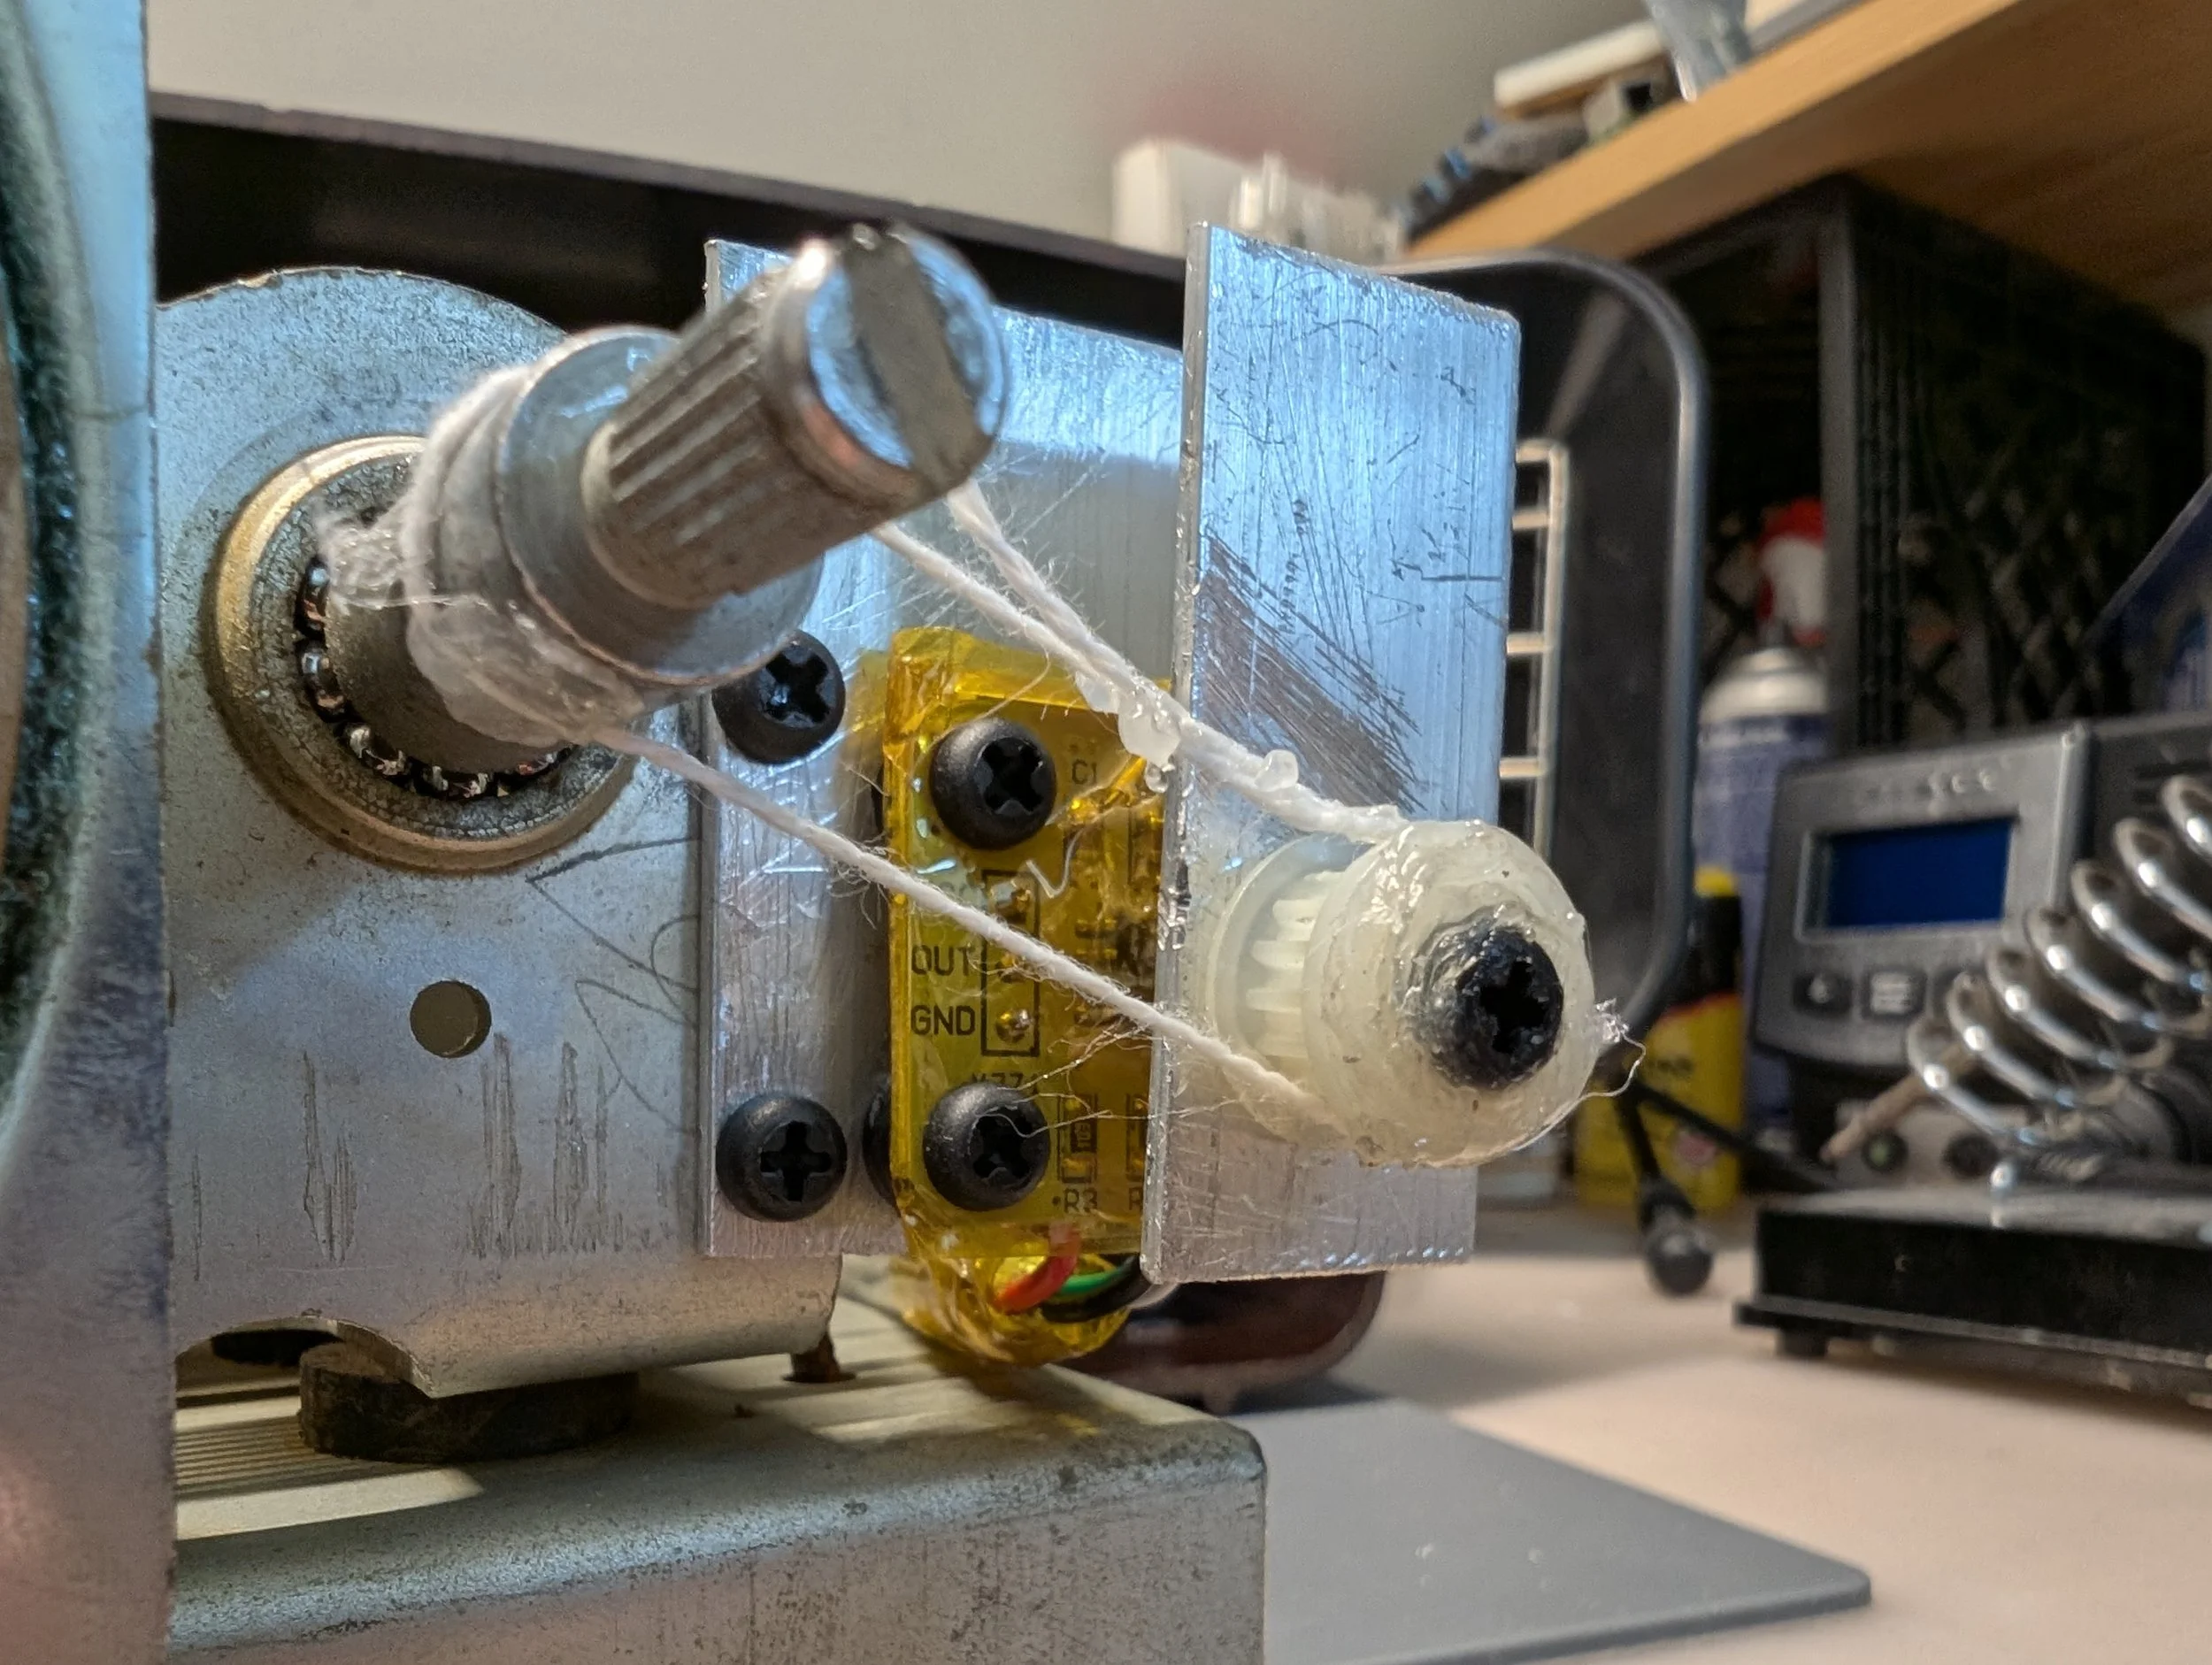
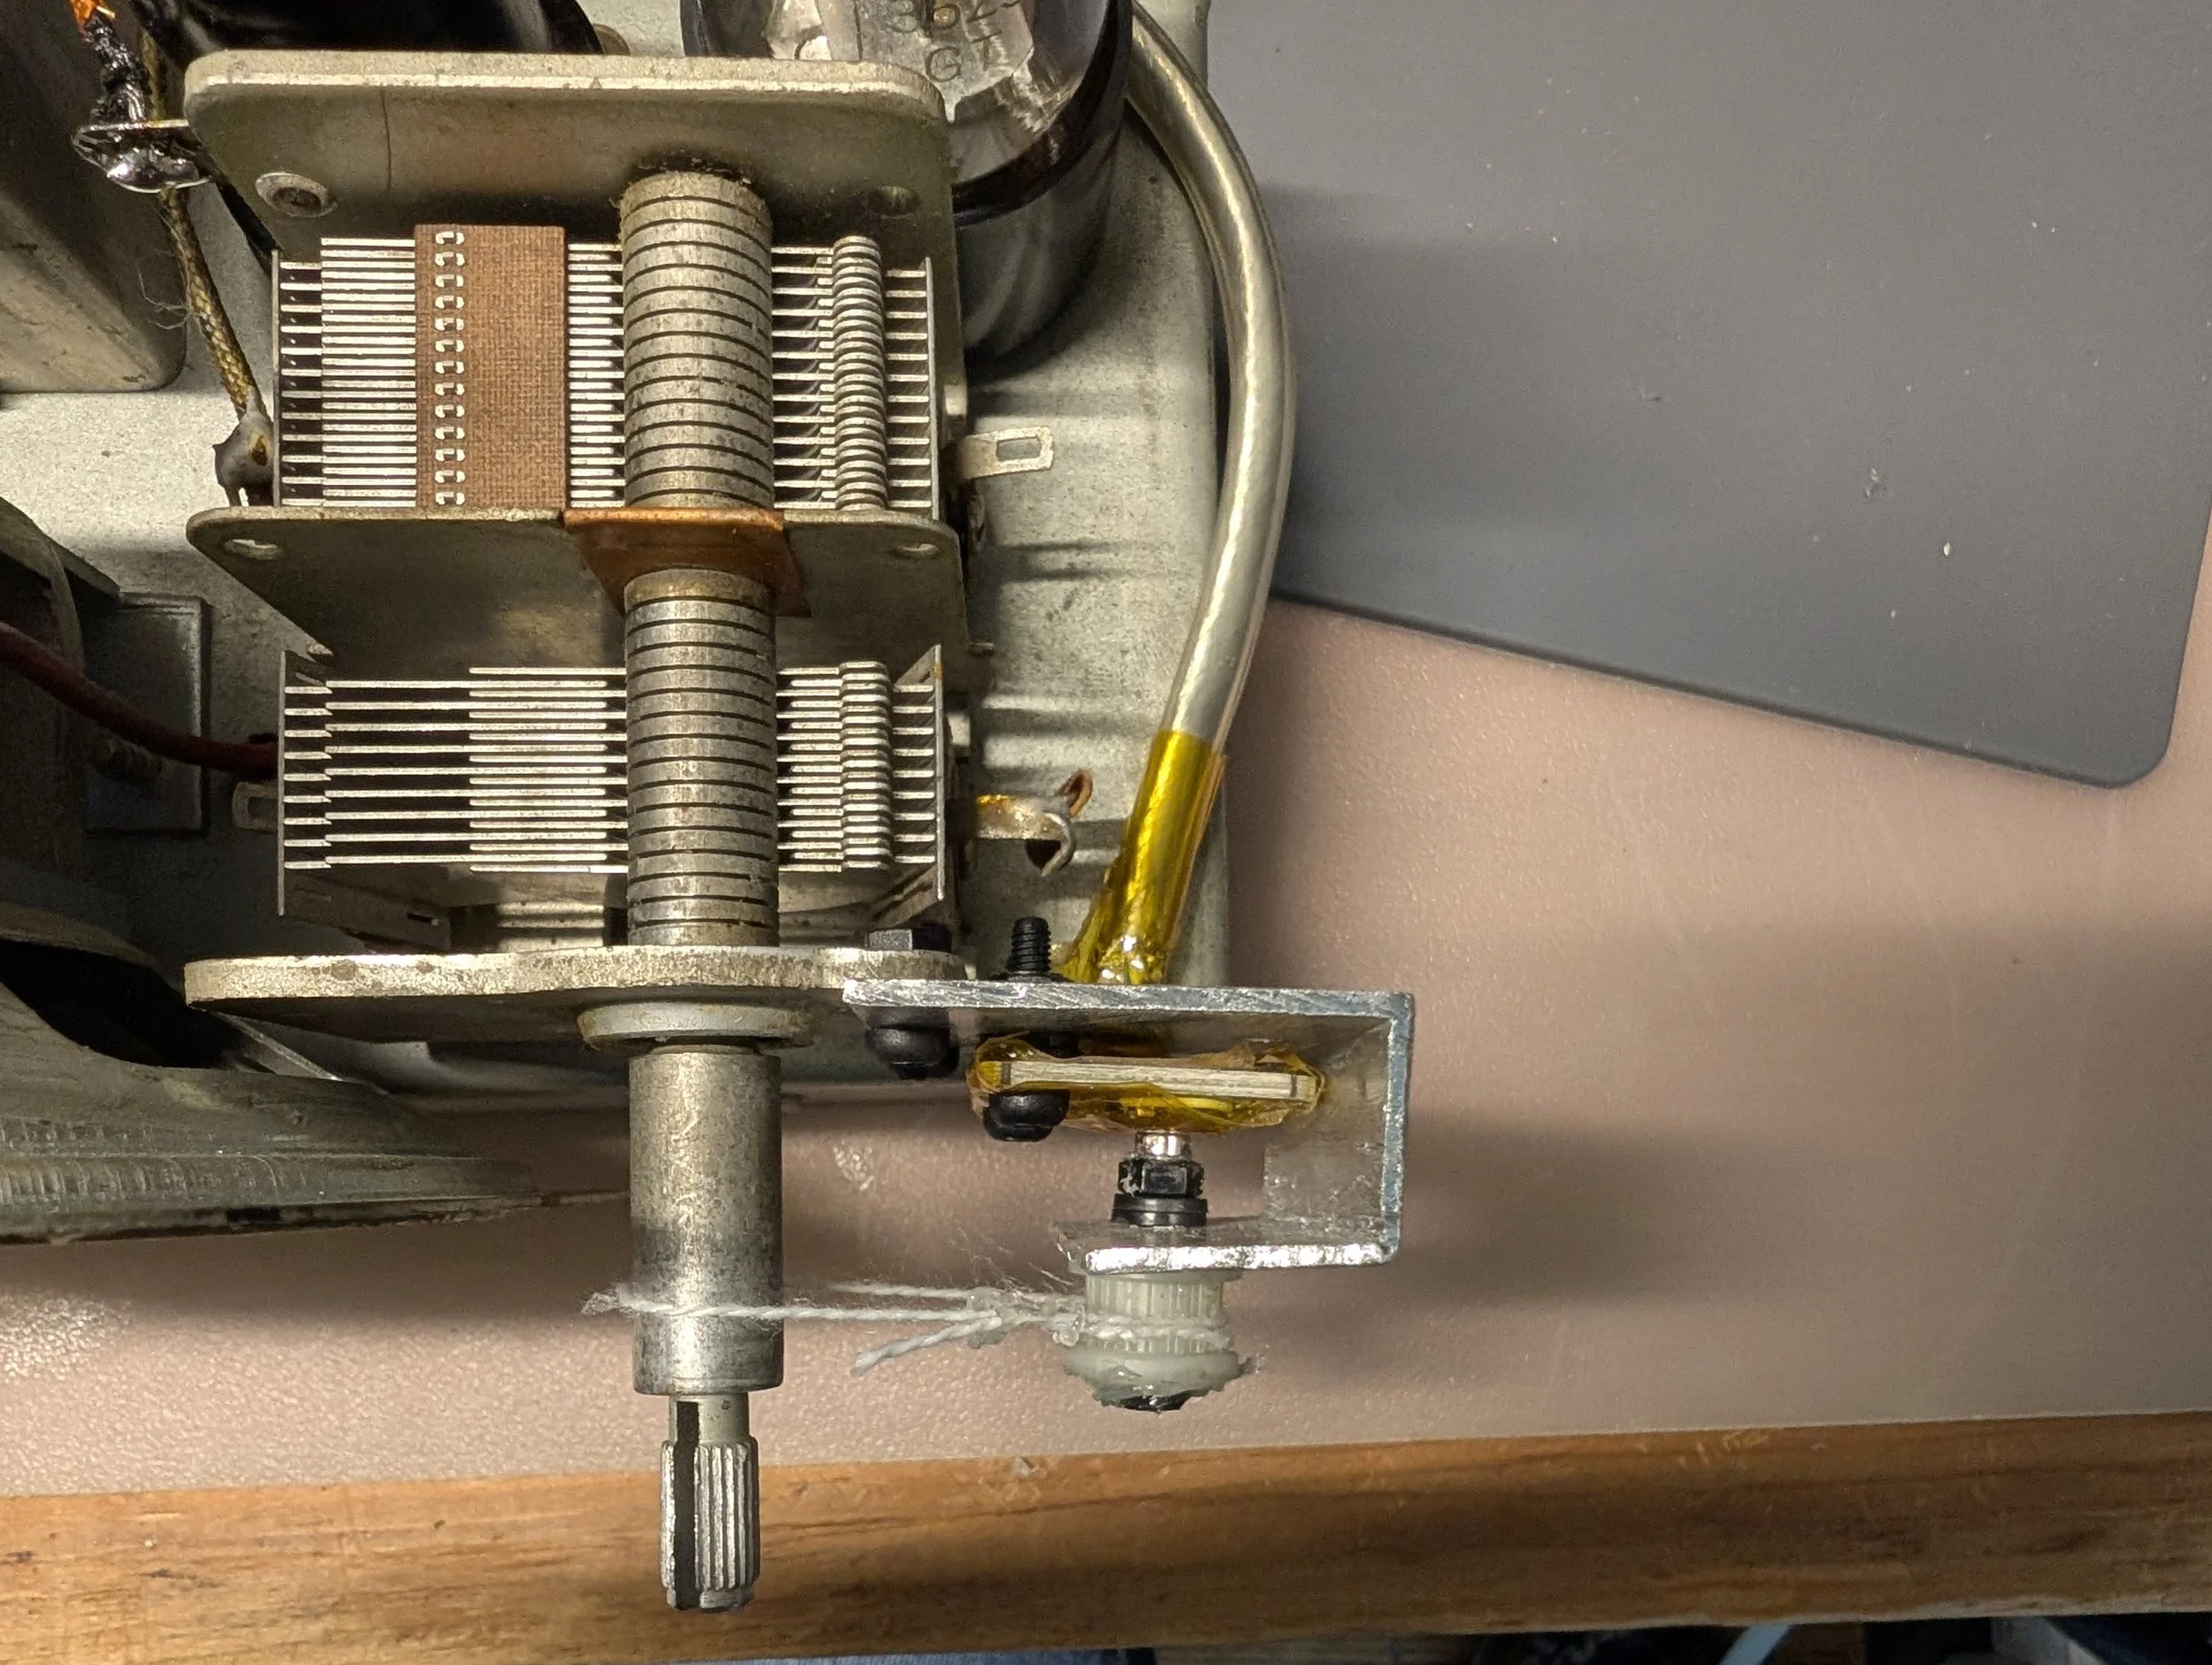
With some scrap aluminum, a gear harvested from an old photocopier, and a length of kite string, I was able to cobble together a way to turn the rotation of the tuning knob into the rotation of a diametrically magnetized neodymium magnet located directly above the hall-effect sensor chip. I used heavily shielded cable to successfully direct the I2C signals through the radio without causing excessive of RF interference when listening to AM stations. Because of the close proximity to the tuning capacitor, I used nylon screws as a precaution to avoid throwing off the radio’s alignment.
Addendum:
The custom scripts I wrote for this project are available on my GitHub here: https://github.com/davidg5678/RadioTimeMachine
Future goals:
I’d like to laser cut a replacement back panel for the radio with cutouts to panel-mount the auxiliary input socket and AUX/AM switch. I made some scans of the original cardboard back panel, so replicating this with the laser in my college makerspace should be trivial.
Before switching to an AS5600 hall-effect angle sensor-based approach, I began by adapting a guide by Richard Whipple. Following his plans, I built a neat circuit that eavesdrops on the oscillating frequencies within a 12SA7 vacuum tube and sends these signals to an Arduino which converts the tuner position into digital values. Unfortunately, I was never able to get my circuit working reliably. Things are tricky when working with RF, and I found that my circuit was extremely prone to interference from the IF stage of the radio, rather than picking up the local oscillator frequency like I wanted it to. I suspect a key difference between my build and Richard’s is that I used a 12SA7 vacuum tube, which is encased by a metal shielding can, while Richard used a glass 12BE6, which lacks such shielding. Out of a desire to see things through, I’ll probably revisit this part of the project at some point, but I must admit, the hall effect sensor solution is cheaper, simpler, and more reliable.
One of my dream projects has been to restore an old 1950s vacuum tube CRT TV, but the general advice I’ve heard when working with vacuum tubes as a beginner is to start small and restore a radio first. I foolishly thought this didn’t apply to me and purchased an enormous 21” 1955 RCA television. However, once I took the back off the TV and began to peek inside, I was quickly overwhelmed and realized starting with a vacuum tube radio was great advice. Now that I’ve finished this radio project, I’m feeling really to take on the TV!